Are you one of those who find writing Dockerfiles, and docker-compose.yml files painful?
At least I never enjoyed it.
I always wondered if I was following the best practices, and not introducing security vulnerabilities unknowingly while writing the Dockerfile , docker-compose config files.
Well, I won’t have to worry about it anymore, thanks to the good people at Docker who put Generative AI to better use without making too much noise about it.
They created a CLI utility tool — docker init
Interesting read:
- Everything You Need To Know About Docker
- Deploy a dockerized Flask app on AWS Using Github Action
- Run multi-container applications with Docker Compose
Introducing docker init
Docker launched the general availability of docker init a few days back. I have tried it, and I found it very useful and I cannot wait to start using it in my day-to-day life.
Note: At the time of writing this article, docker init is only available with the docker desktop.
What is docker init?
docker init is a command-line utility that helps in the initialization of Docker resources within a project. It creates Dockerfiles, Compose files, and .dockerignore files based on the project’s requirements.
This simplifies the process of configuring Docker for your project, saving time and reducing complexity.
Latest version of
docker initsupports Go, Python, Node.js, Rust, ASP.NET, PHP, and Java. It is available with Docker Desktop.
How to use docker init?
Using docker init is easy and involves a few simple steps. First, go to the directory of your project where you want to set up Docker assets.
Let me Create a basic Flask app.
touch app.py requirements.txtCopy the below code into the respective files
# app.py
from flask import Flask

app = Flask(__name__)

@app.route('/')
def hello_docker():
    return '<h1> hello world </h1'

if __name__ == '__main__':
    app.run(debug=True, host='0.0.0.0')
# requirements.txt
FlaskLet’s see the magic of docker init
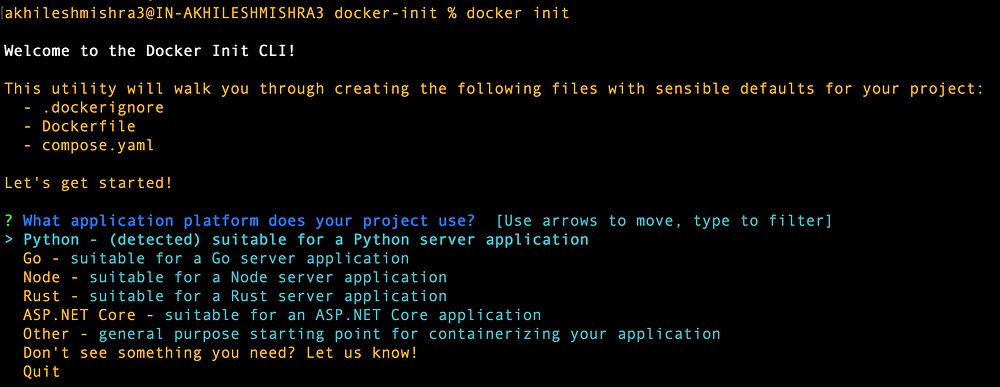
docker initwill scan your project and ask you to confirm and choose the template that best suits your application. Once you select the template,docker initasks you for some project-specific information, automatically generating the necessary Docker resources for your project.
docker init
The next thing you do is choose the application platform, for our example we are using python. It will suggest the recommended values for your project such as Python version, port, entrypoint commands.

You can either choose the default values or provide the values you want, and it will create your docker config files along with instructions for running the application on the fly.

Let’s see what this auto-generated config looks like.
Dockerfile
# syntax=docker/dockerfile:1

# Comments are provided throughout this file to help you get started.
# If you need more help, visit the Dockerfile reference guide at
# https://docs.docker.com/engine/reference/builder/

ARG PYTHON_VERSION=3.11.7
FROM python:${PYTHON_VERSION}-slim as base

# Prevents Python from writing pyc files.
ENV PYTHONDONTWRITEBYTECODE=1

# Keeps Python from buffering stdout and stderr to avoid situations where
# the application crashes without emitting any logs due to buffering.
ENV PYTHONUNBUFFERED=1

WORKDIR /app

# Create a non-privileged user that the app will run under.
# See https://docs.docker.com/go/dockerfile-user-best-practices/
ARG UID=10001
RUN adduser \
    --disabled-password \
    --gecos "" \
    --home "/nonexistent" \
    --shell "/sbin/nologin" \
    --no-create-home \
    --uid "${UID}" \
    appuser

# Download dependencies as a separate step to take advantage of Docker's caching.
# Leverage a cache mount to /root/.cache/pip to speed up subsequent builds.
# Leverage a bind mount to requirements.txt to avoid having to copy them into
# into this layer.
RUN --mount=type=cache,target=/root/.cache/pip \
    --mount=type=bind,source=requirements.txt,target=requirements.txt \
    python -m pip install -r requirements.txt

# Switch to the non-privileged user to run the application.
USER appuser

# Copy the source code into the container.
COPY . .

# Expose the port that the application listens on.
EXPOSE 5000

# Run the application.
CMD gunicorn 'app:app' --bind=0.0.0.0:5000
And look at it, it wrote a better Dockerfile than I ever could.
It follows all the best practices for performance and security people kept telling us in all those Linkedin and Medium posts.
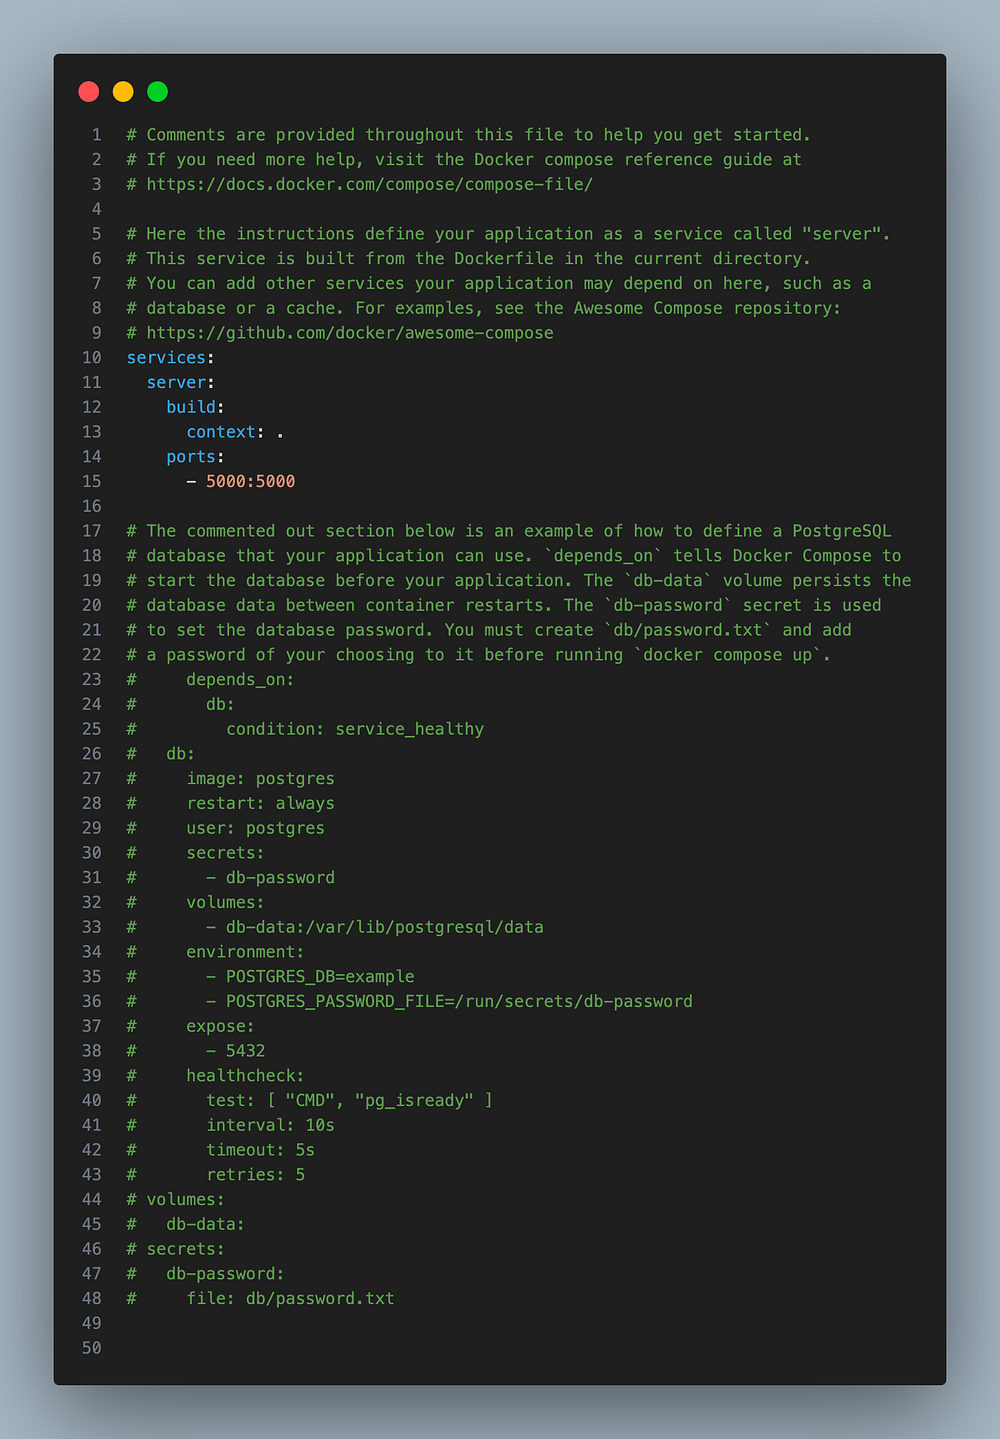
compose.yaml

It wrote the docker-compose config to run the app. Since our app did not include any connection to the database, it commented out the code you might need for the database container.
If you want to use a database with your Flask app, uncomment the db service config from the docker-compose file, create a local file with secrets, and run the app. It also generated us .dockerignore file.
Why use docker init?
The docker init makes dockerization a piece of cake, especially for the Docker newbies. It eliminates the manual task of writing Dockerfiles and other configuration files, saving time and minimizing errors.
It uses templates to customize the Docker setup based on your application type while following the industry’s best practices.
Final worlds
To conclude, docker init does it all.
- Write better Docker configuration than 90% of kids out here.
- Follows best practices like a nerd.
- Save time, effort, and sarcastic comments from security folks when their tools generate a report with hundreds of vulnerabilities you never thought existed.
Disclaimer: Just like any other AI-based tool, this one is not perfect either. Do not blindly trust the configuration it generates. I recommend you have another look at the config before you push it forward.
That is all for this post, see you on the next one.
Connect with me on Linkedin: https://www.linkedin.com/in/akhilesh-mishra-0ab886124/

