
In this blog, I will explain the concepts around Single sign-on (SSO) and walk through the complete process of setting up AWS SSO with OKTA in AWS and OKTA console. In the Next blog post, I will set up the same using Terraform.
When you Federate your AWS account with Okta, users can authenticate to one or more AWS accounts and access specific IAM roles using single sign-on (SSO) with SAML. You can import roles from one or more AWS accounts into Okta, assign them to users, and set the duration of the authenticated sessions.
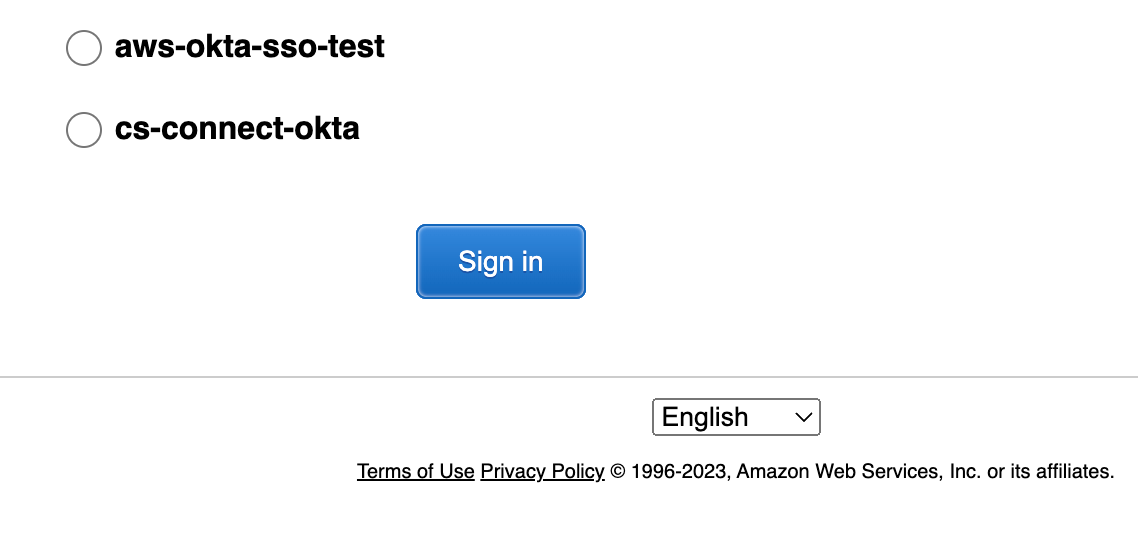
When logging into AWS with Okta, users pick a role from their assigned AWS roles and assume the sets of permissions for the current session.
SAML 2.0 Single sign-on for AWS Federation using OKTA
Before I jump to setting up the SSO, I want to talk about some useful terminology around it.
What is SSO?
SSO stands for Single Sign-On. It’s a way to log in to multiple applications with just one set of credentials. SSO makes it easier for users by reducing the number of passwords they need. It helps track user access and ensures strong control over data access.
What is SAML (or SAML 2.0), and how it works?
SAML stands for Security Assertion Markup Language. It enables secure communication and exchange of authentication/authorization data between the identity provider and service provider
What is an Identity provider?
It is an entity/system that manages user identities and authentication for you. In this case, Okta is the Identity provider.
What is a service provider?
It is an entity/system that offers a service, application, or resource that users want to access. In this case, AWS is a service provider.
Step-by-step guide for setting up AWS SSO with Okta
- Create an Okta app and use the IDP metadata to set up the AWS IAM identity provider.
- Create an IAM role and add Okta as a trusted source. We will also add specific permission for the role.
- Create a service account, and generate the access key and secrets.
- Complete Okta app SAML and provisioning settings.
- Create an Okta group assign this group to the Okta app and select the roles
- Create Okta users, add the user to the group, and finally test if the single sign-on to AWS working.
Let’s get to it
1. Configuring Okta as the AWS account identity provider.
- Creating Okta app for AWS SSO
Log in to the Okta admin console and go to the Application. We will be using a preconfigured app for AWS SSO for this.
You can also create the app from scratch if you feel extra adventurous to reinvent the wheel.

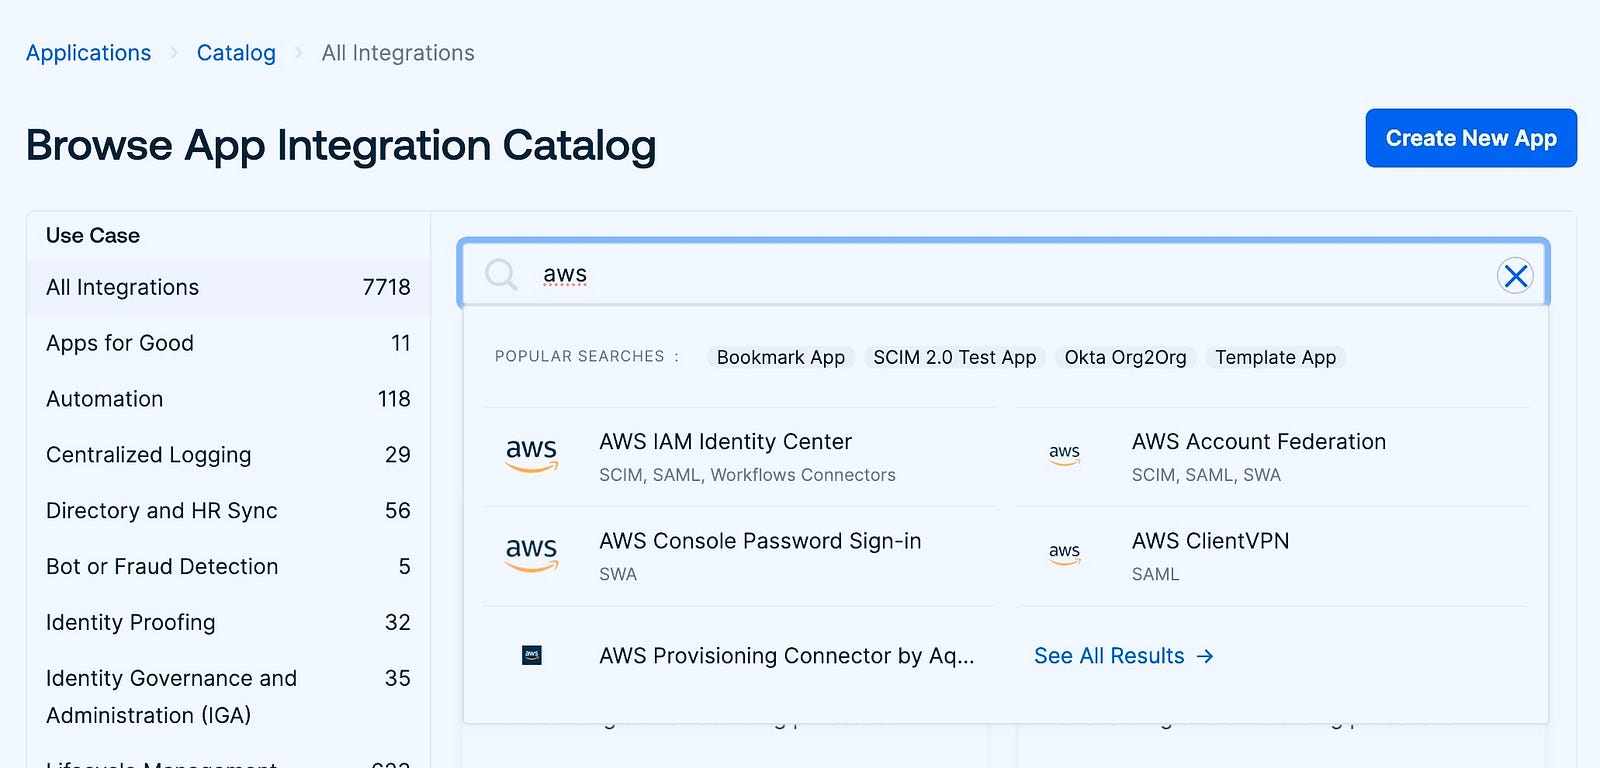
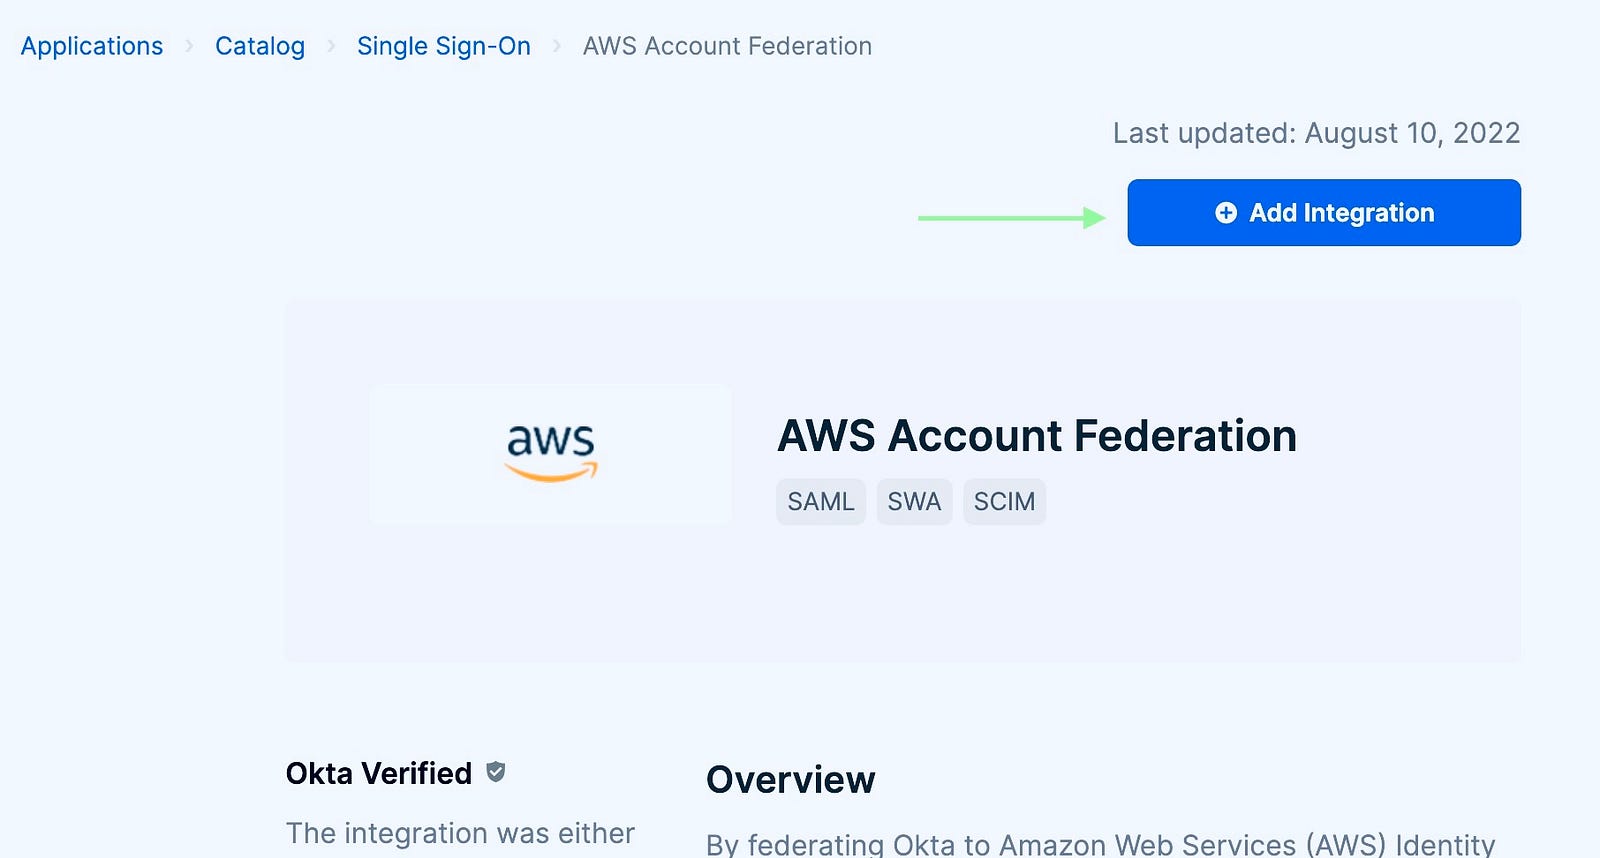
Give a suitable application label and provide a login URL. Go next and save the app with defaults, we will be setting the app later.

After creating the app, go to applications and look for the app you just created. Once you find it, click and open the Sign On tab and scroll down to the SAML Signing Certificates section. Click View IDP metadata.
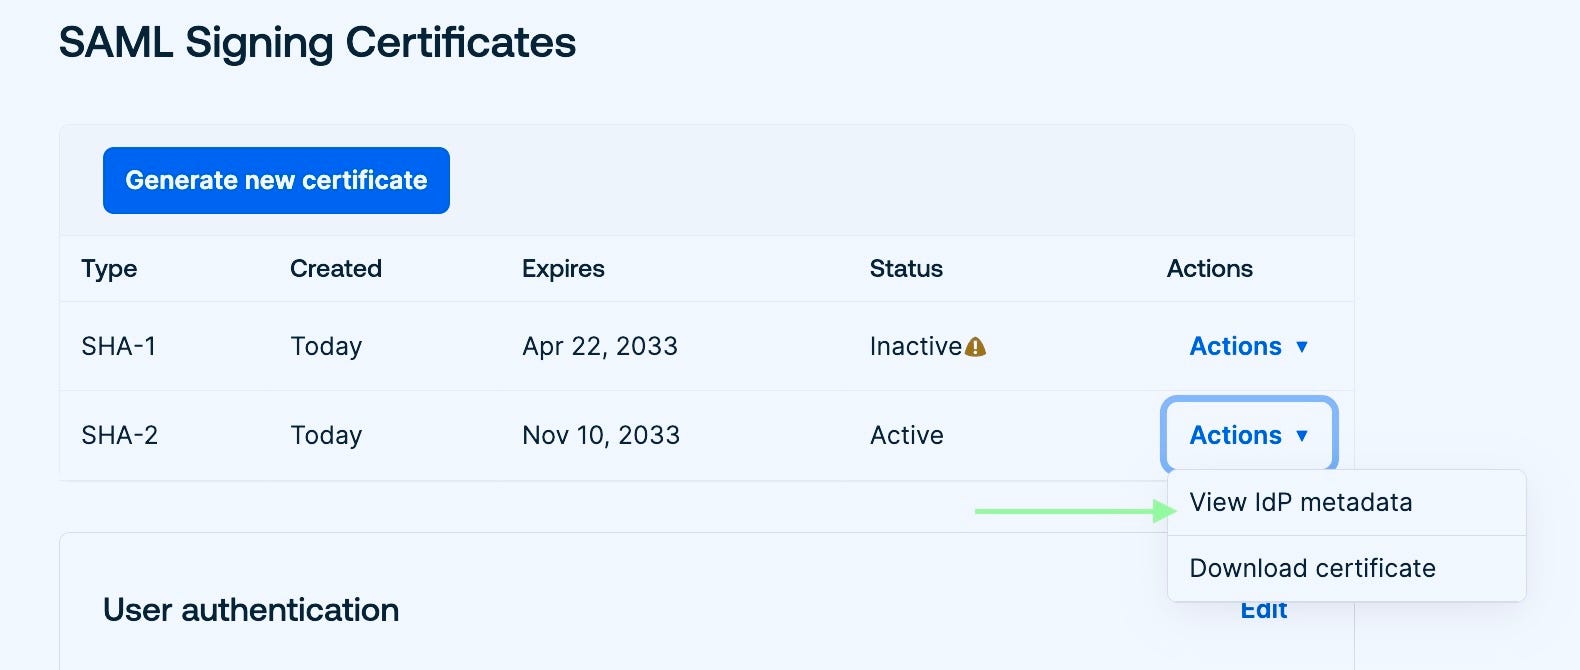
It will open a metadata XML in a new browser tab. Copy and save the file with a .xml extension, i.e. okta-metadata.xml. We will be using this file in the next step.
- Creating AWS IAM identity provider
Login to AWS console and go to IAM, identity provider, and create identity provider.
Choose a name (in our case, aws-sso-okta-test), and attach the IDP metadata XML file you saved in the last step.

Copy the arn of the resource — arn:aws:iam::12345678910112:saml-provider/aws-sso-okta-test
2. Adding Okta as a trusted source for AWS roles
Now you create a new IAM role or use an existing role.
We will be creating a new role — aws-okta-sso-test
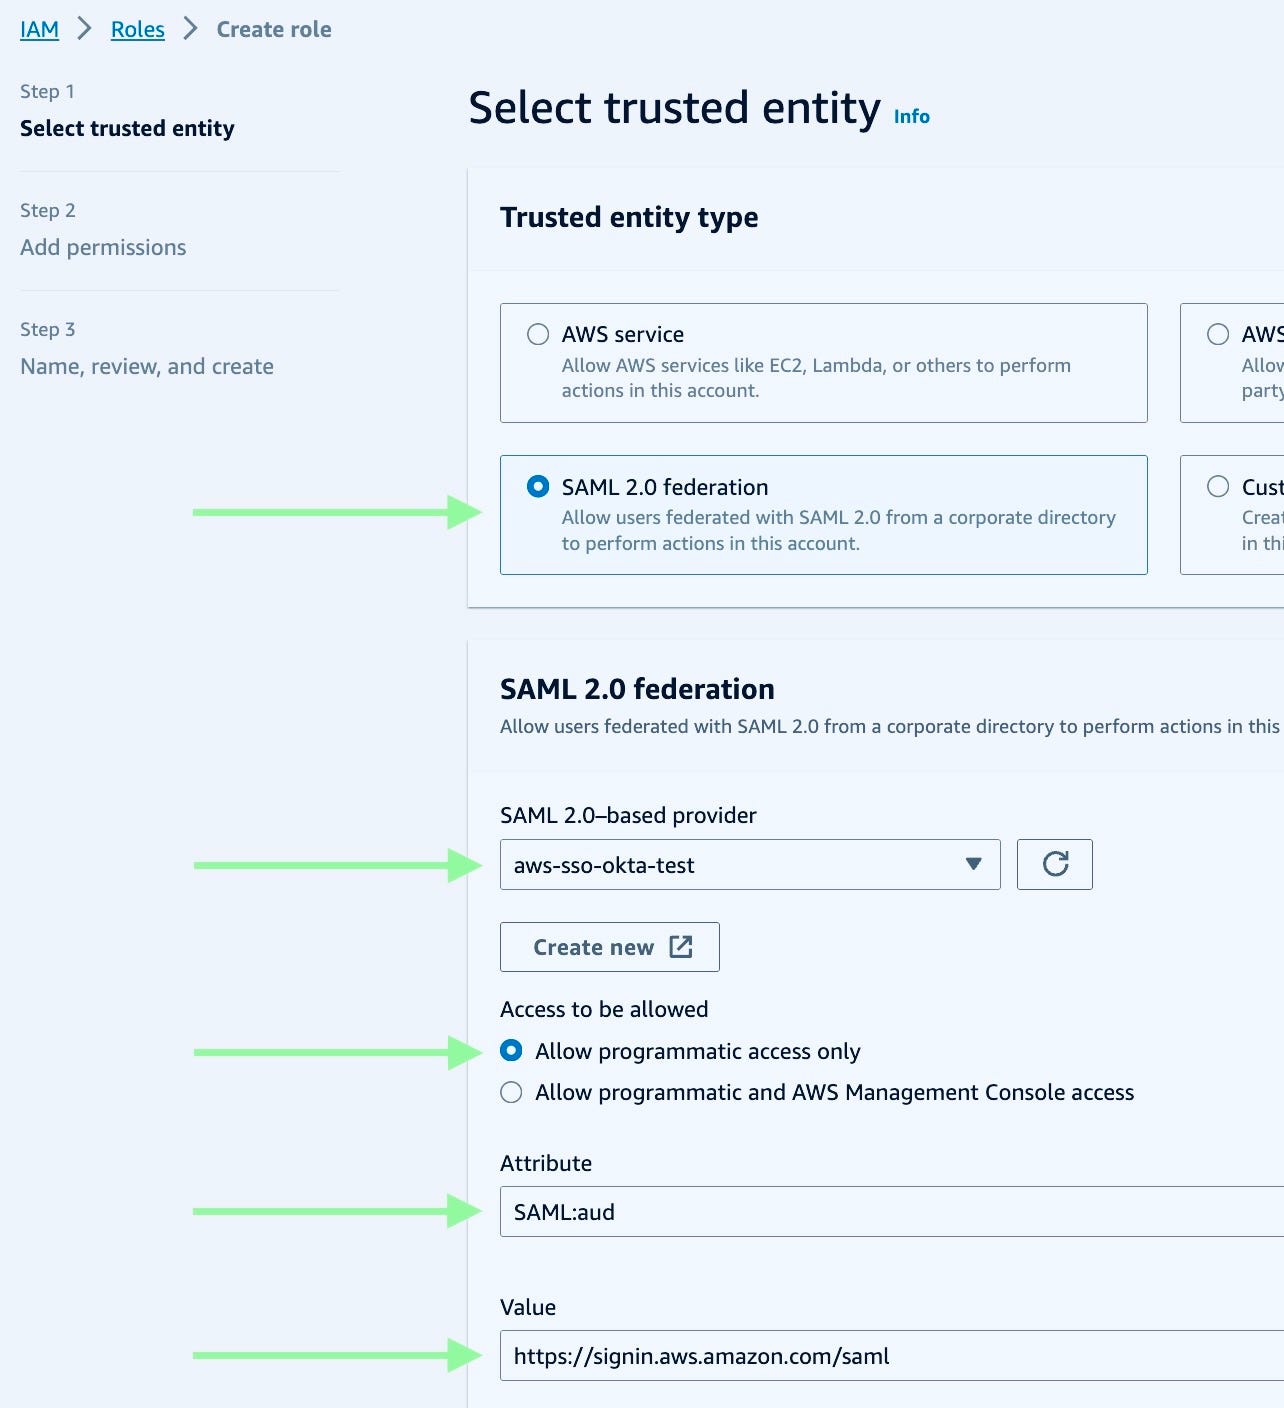
Go next and add the required permissions for that role as per your need.
If you are using an existing role, add the below policy to that role’s existing policies trust relationships tab. Use the arn from the identity provider resource created in the last step.{
"Effect": "Allow",
"Principal": {
"Federated": "arn:aws:iam::12345678910112:saml-provider/aws-sso-okta-test"
},
"Action": "sts:AssumeRoleWithSAML",
"Condition": {
"StringEquals": {
"SAML:aud": "https://signin.aws.amazon.com/saml"
}
}
}
3. Creating a service account and generating keys for Okta to download AWS roles.
Now go to IAM, create a service user account, and add the below permissions. It's fairly straightforward.{
"Version": "2012-10-17",
"Statement": [
{
"Effect": "Allow",
"Action": [
"iam:ListRoles",
"iam:ListAccountAliases"
],
"Resource": "*"
}
]
}
Generate the access key, and download it.
Note: Ideally you should store the access keys, and secrets in the secrets manager or vault.
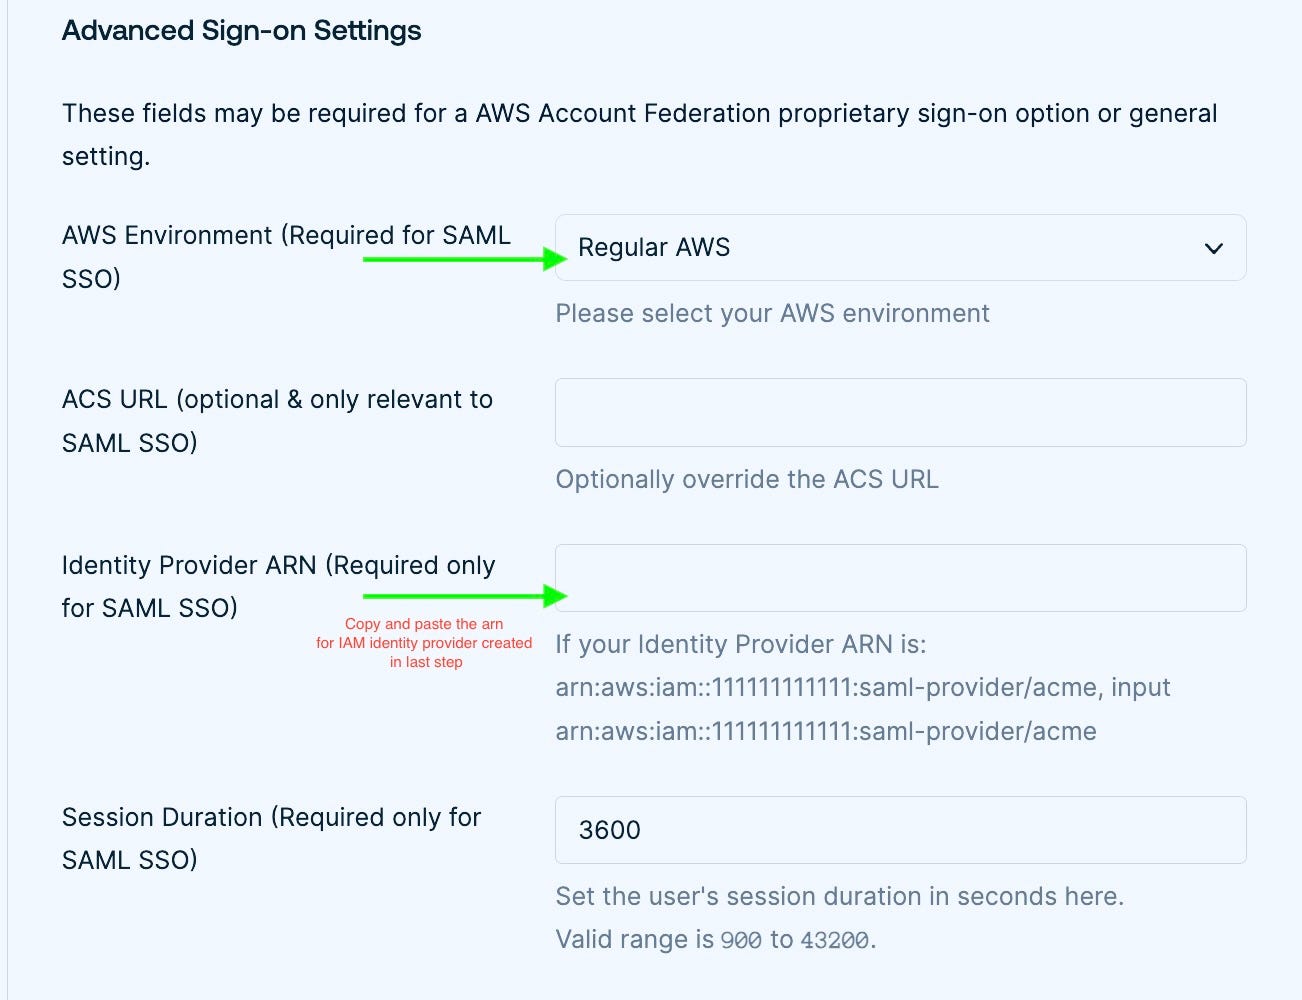
4. Configuring the AWS Account Federation app in Okta.
- Updating Sign-on setting
In Okta, go to Applications and search for your application. Go to the Sign On tab, and scroll to Advance sign-on settings
Choose your AWS environment from the dropdown. ACS URL is optional, use this one if your environment is not listed in the dropdown. If you are not sure what should be the ACS url, contact AWS support.
In Identity Provider ARN, use the one we created in the previous steps. arn:aws:iam::12345678910112:saml-provider/aws-sso-okta-test.
Choose your desired session duration or leave the default one and click save.
- Enabling API Integration
Enter the access key, and secret generated in the last step, and click Test credentials. It will test the validity of credentials
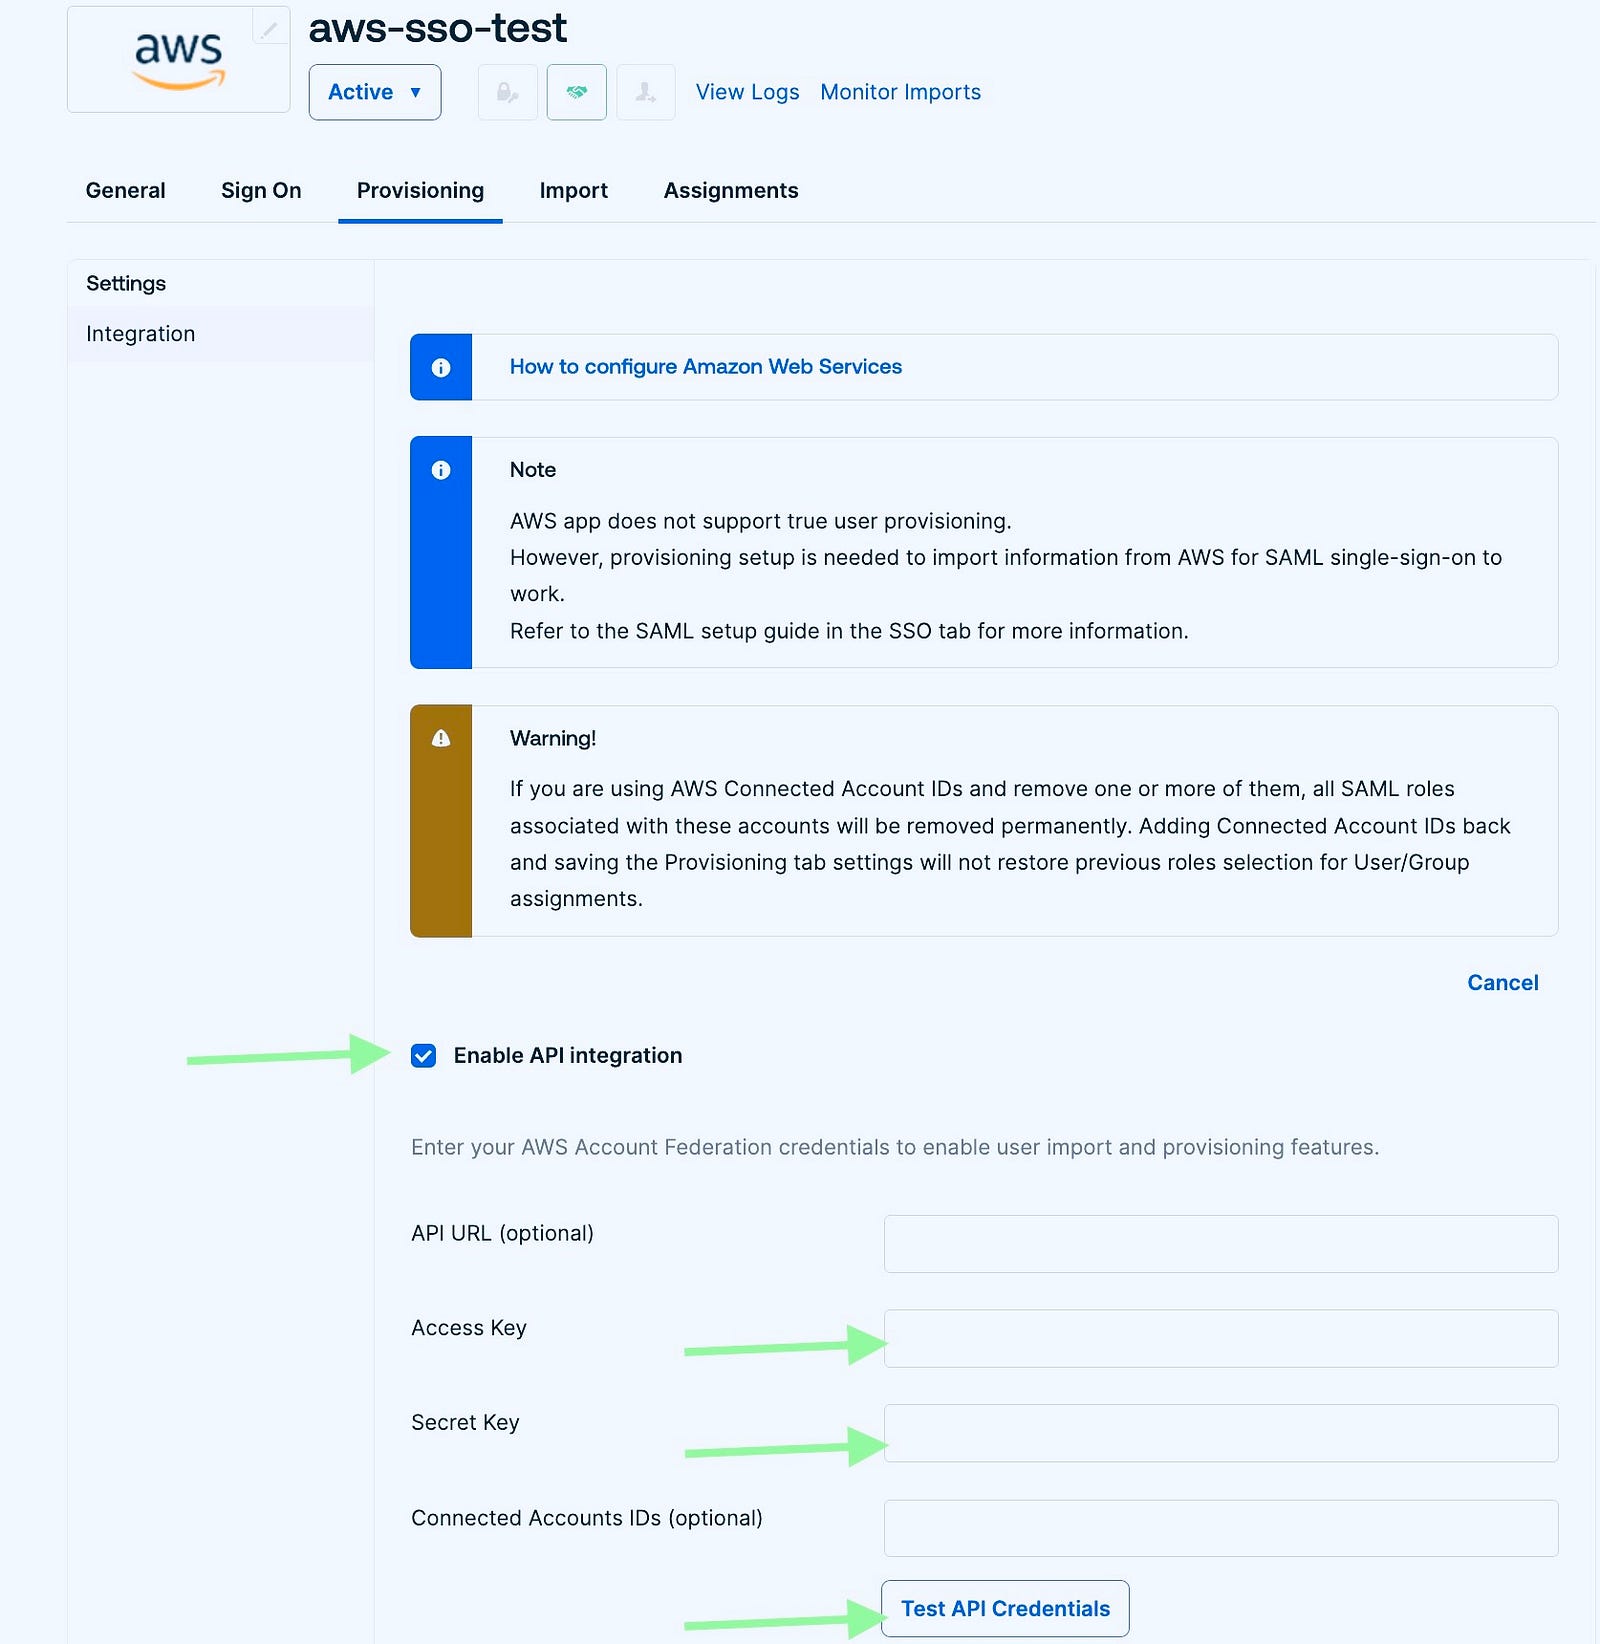
- Enabling Create Users and Update User Attributes
Now Go to the Provisioning tab again

Enable create users, and update user attributes. Save it.
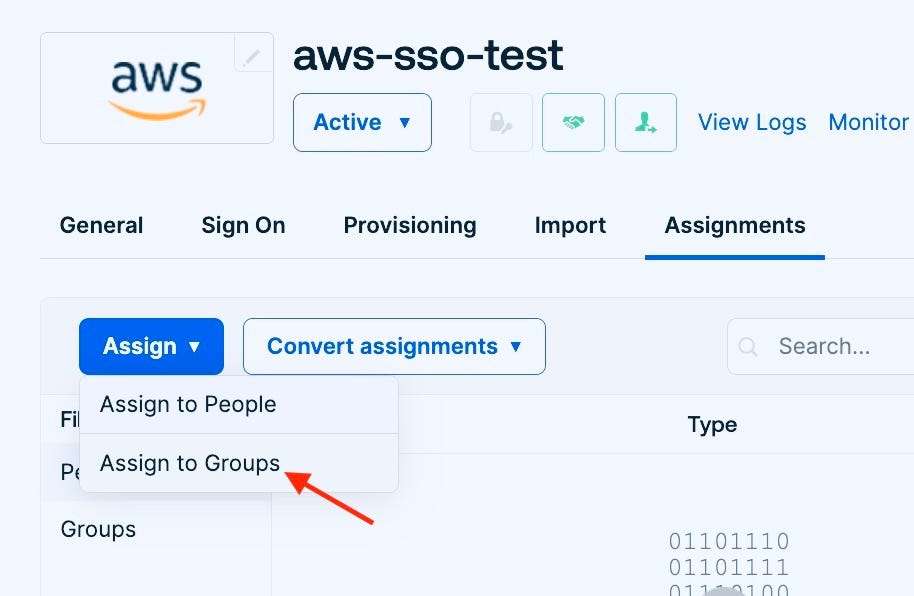
Now we are done with setting up the app. Now we will go to assigning users/groups with desired roles to the Okta app.

Note: We are not creating/updating any users in AWS. It enables Okta to retrieve Okta-trusted roles from the AWS account.
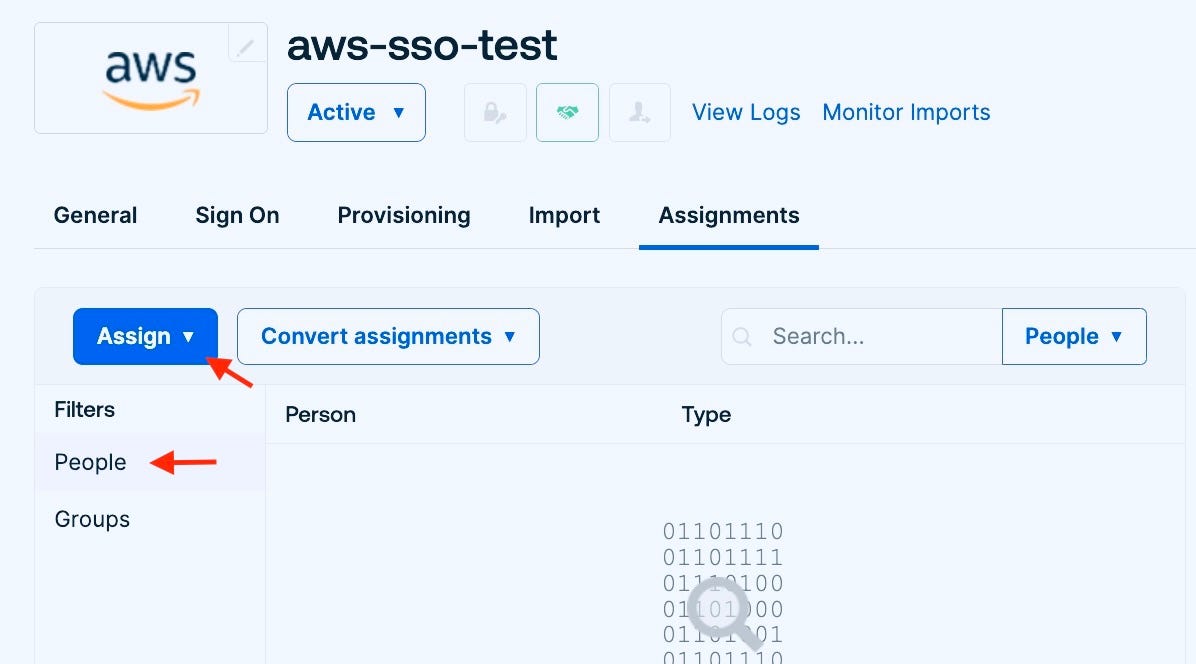
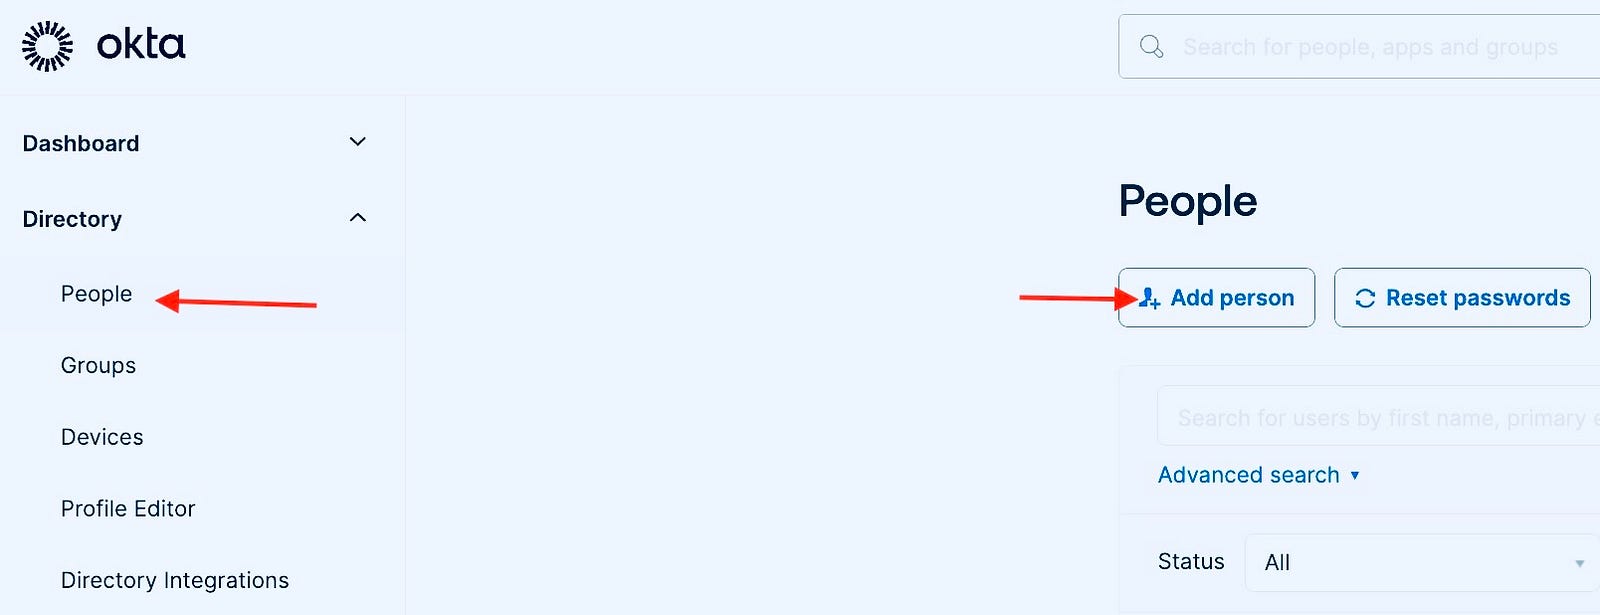
Access to the Okta app can be given to users and groups. Let’s test it by adding a user to the app.
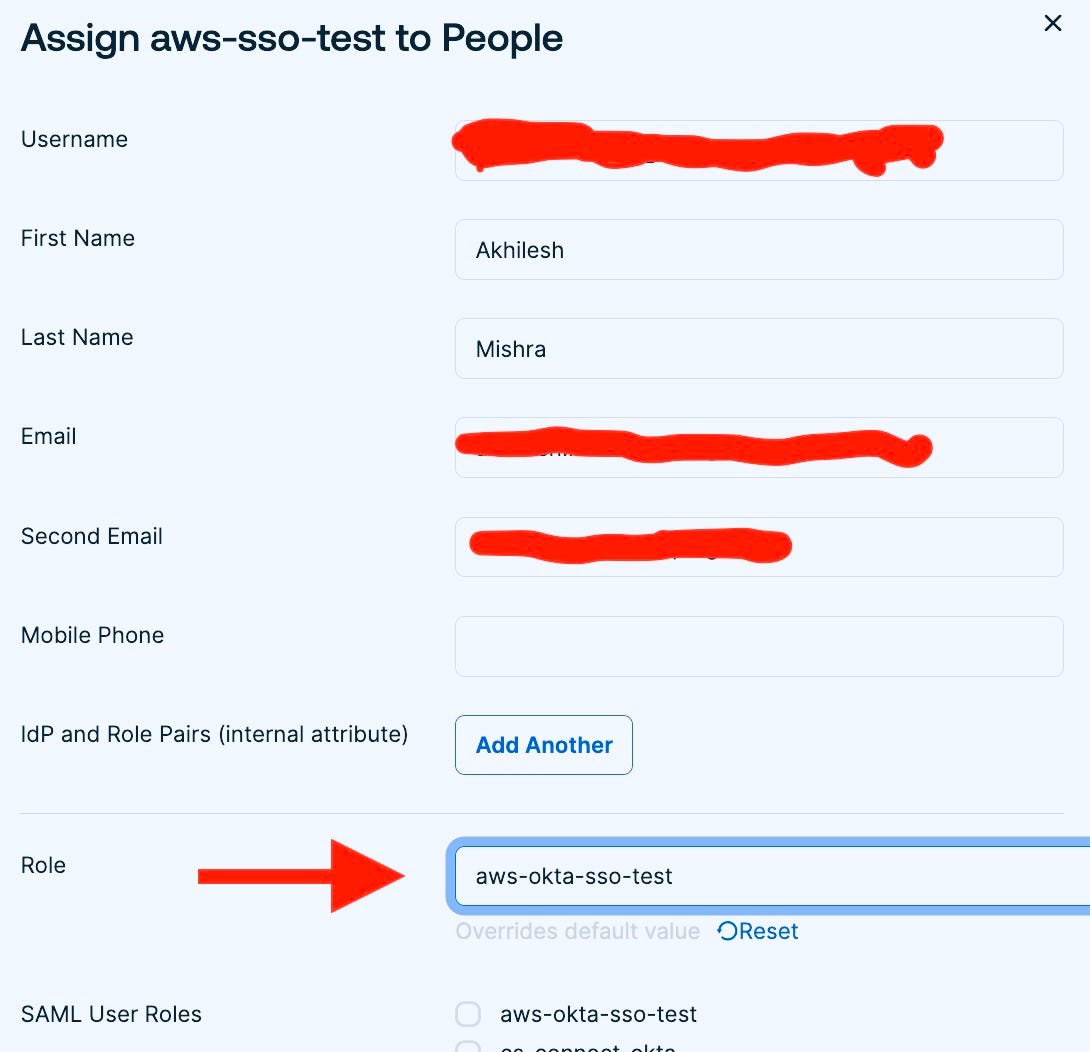
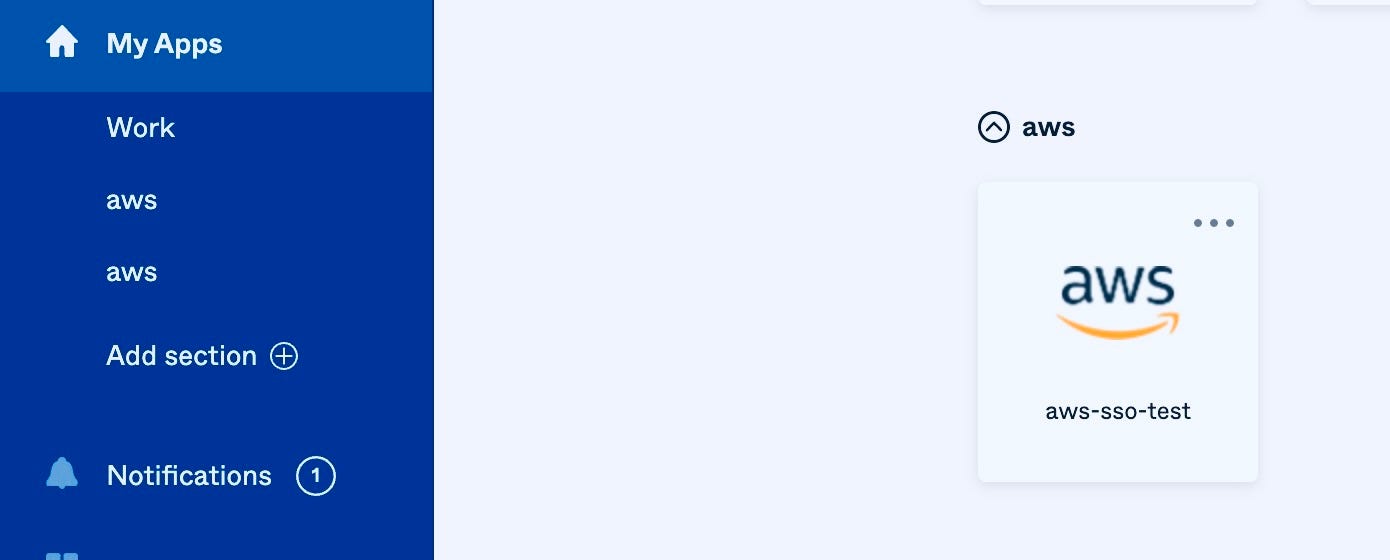
Now go to Okta, and you will see the below AWS app, click on it and it will authenticate and redirect to the AWS console with the permissions attached to the IAM role.
Assigning users to the app isn’t suitable when you are working with teams. It’s best practice to add users to a group and assign a group to the Okta app with desired IAM roles.
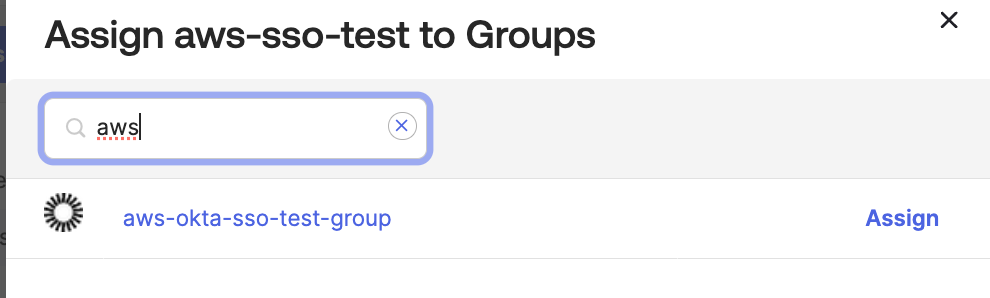
5. Creating an Okta group, and assigning it to the Okta app and

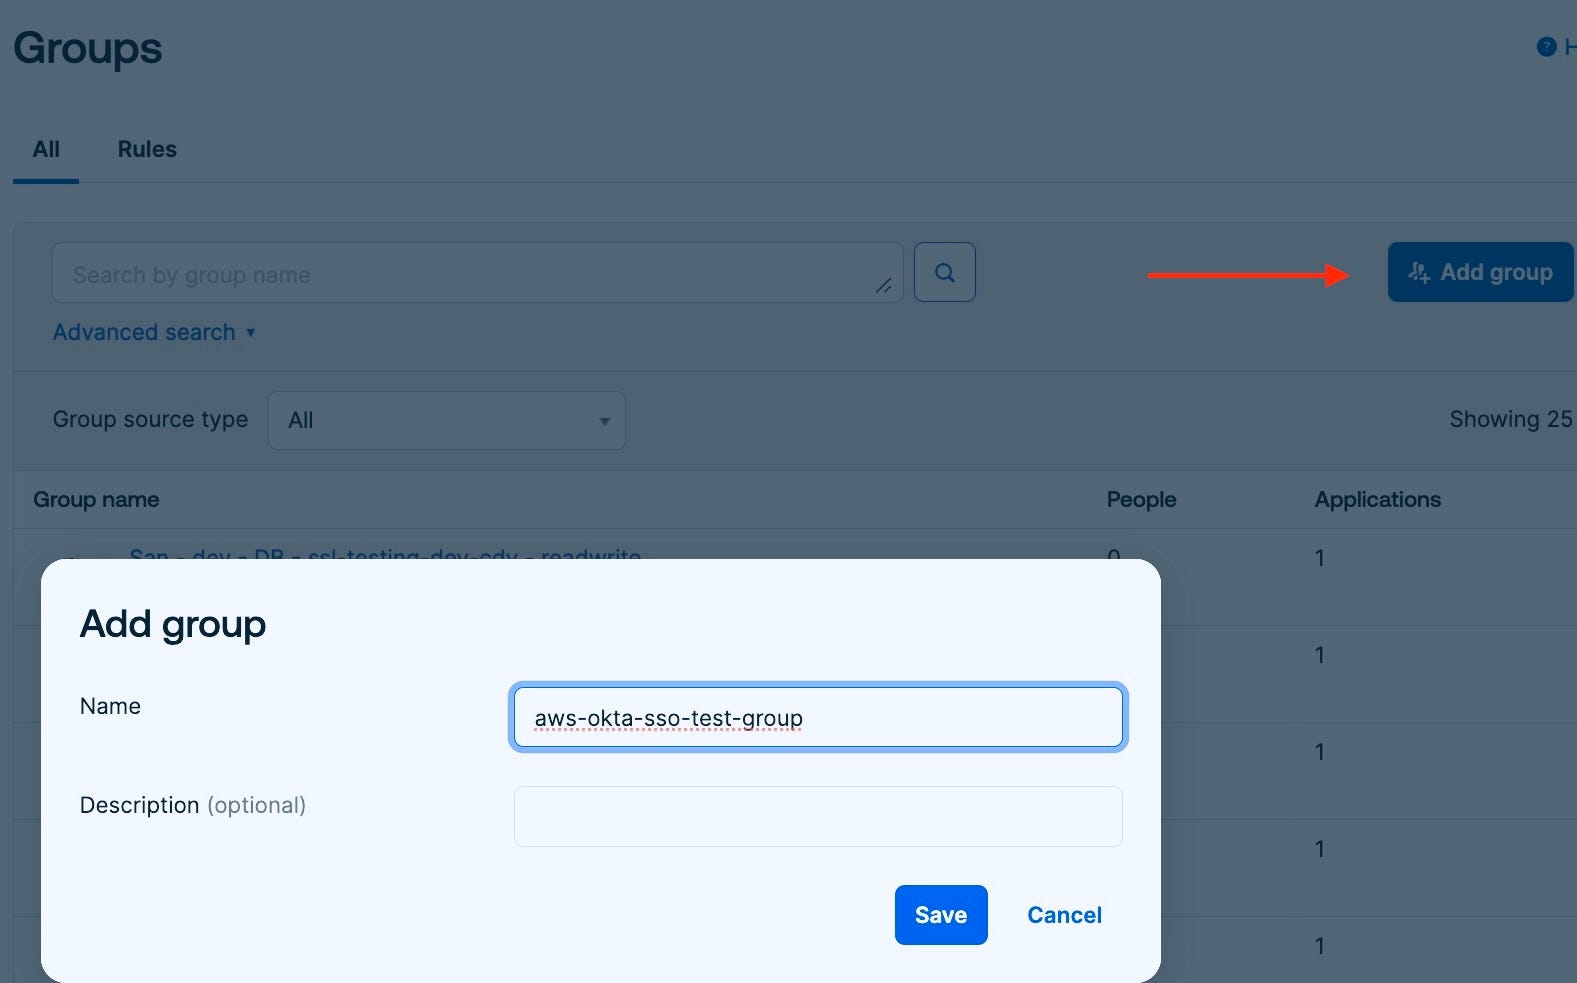
Now go to your Okta application, and switch to the Assignment tab. You can see the users/groups added to Okta.
On the left side, you will see the option to Assign users and groups.
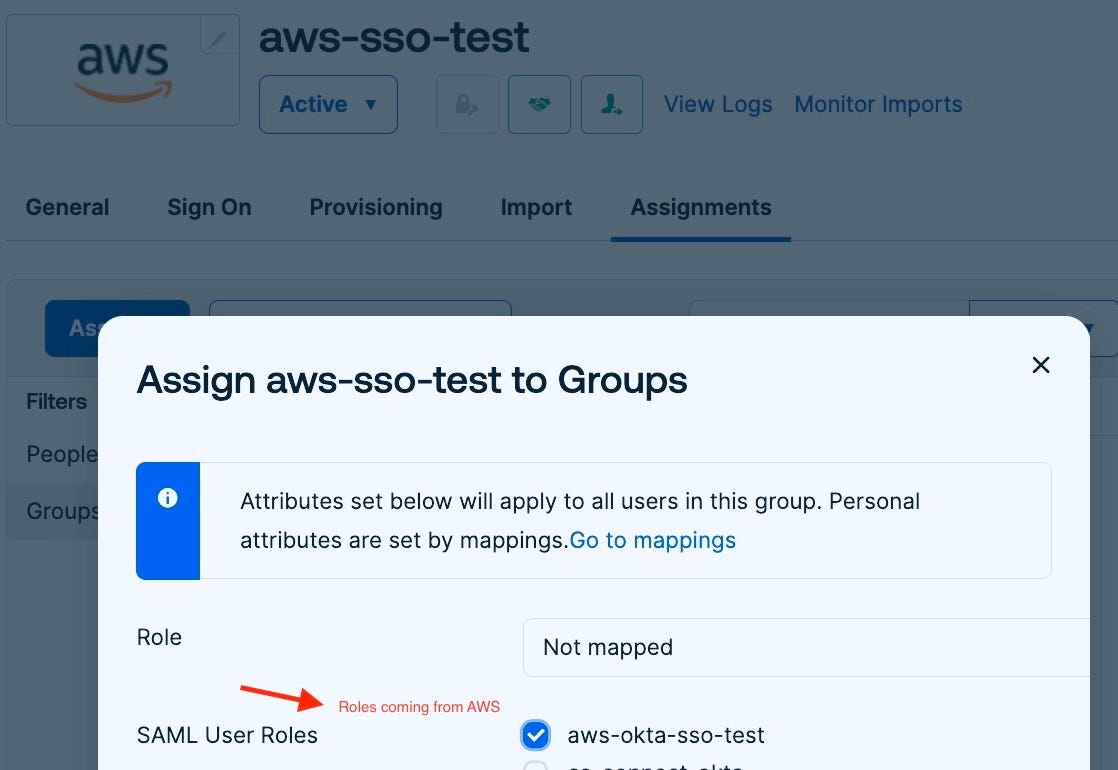
On SAML user roles, pick the one you want the users in this group should have access to. These are the roles coming from AWS.
6. Creating Okta user, adding to Okta group and final testing
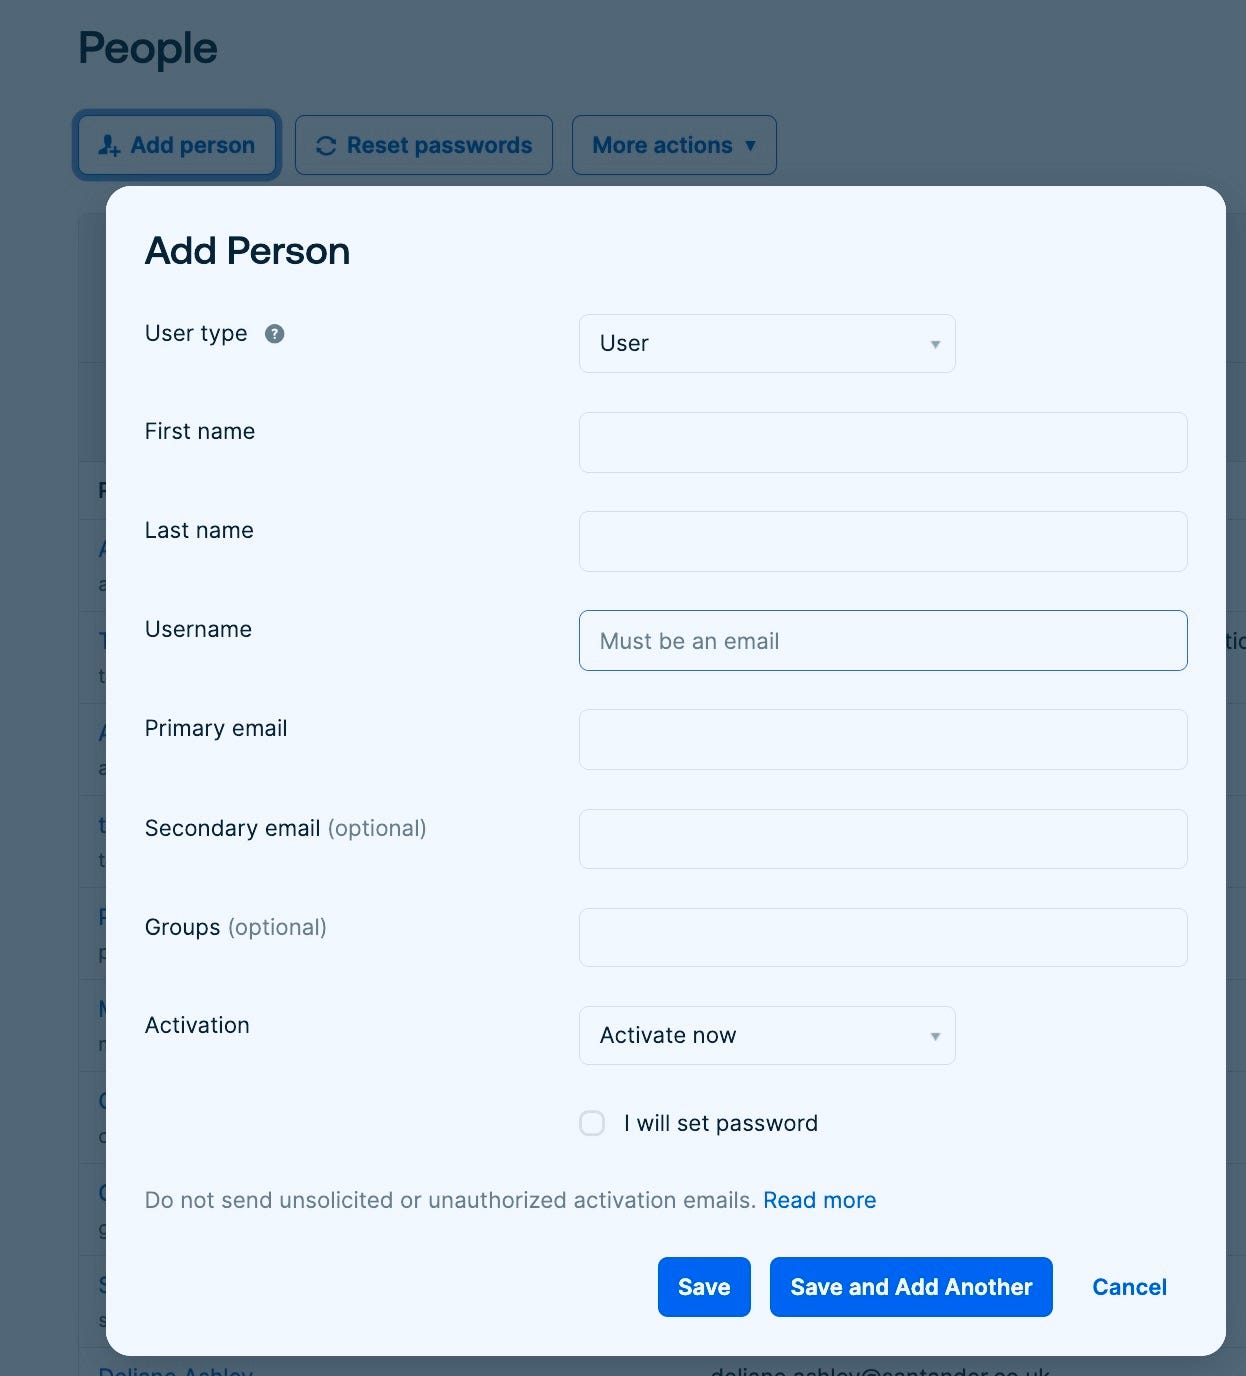
Now add the user you just created to the group.
And that is all you need to do.
Now you can log in to your Okta dashboard and you will see the AWS Okta app. Click the app and it will authenticate and log you to aws console with a pre-assigned role.
If you are assigned to multiple roles, then it will prompt you to log in as a particular role.
That’s all for this blog post. See you in the next one, where we will use Terraform to set up single sign-on for AWS.
Credit: All the screenshots used in this blog are provided by the author.
Resources: https://help.okta.com/en-us/content/topics/deploymentguides/aws/aws-configure-aws-app.htm
