
Stop manually hunting Python Dependencies and automate requirements.txt generation with these powerful tools
As a DevOps engineer, I frequently collaborate with multiple teams, diving into various projects and repositories. One common challenge I face is encountering Python code without a requirements.txt file.
Every time I run such code, I need to figure out and manually install the necessary dependencies. I found it a waste of time and effort. I am sure you guys also feel the same way.
So I dug around, did some Google searches, experimented with a few tools, and found many good ones. My favorites are pipreqs and pigar.
In this comprehensive guide, I’ll show you how to use these Python dependency management tools to generate requirements.txt files automatically for any Python project.
Why Not Use pip freeze?
Before diving into the solutions, let’s address why pip freeze isn’t always the best choice for generating requirements.txt:
❌ pip freeze problems:
- Only saves packages installed with
pip installIn your current environment - Includes ALL packages in the environment, even those not used in your project (if you don’t use virtualenv)
- Sometimes you need to create
requirements.txtfor a new project without installing modules first - Can include system-wide packages that aren’t relevant to your project
✅ What we need instead:
- Tools that analyze your actual Python code
- Generate requirements based on import statements
- Create clean, project-specific dependency lists
Method 1: Using pipreqs
I like to work with isolated Python virtual environments as I like to clean up after using things, and I don’t want too many Python packages installed globally.
# Create a directory/folder
mkdir pipreqs_blog
cd pipreqs_blog
# Create a virtual environment
python3 -m venv venv
# Activate the virtual environment
source venv/bin/activate
Installing pipreqs
# Install pipreqs
pip install pipreqs
I will use one fun Python script ChatGPT provided for the demo. Create a file word_cloud_generator.py inside the project folder and paste the code below.
mkdir project
cd project
vi word_cloud_generator.py
Copy and paste this code into your Python file.
import matplotlib.pyplot as plt
from wordcloud import WordCloud
from collections import Counter
import requests
from PIL import Image
import numpy as np
import argparse
from io import BytesIO

def get_mask_image(url):
    """Download and process mask image from URL"""
    response = requests.get(url)
    img = Image.open(BytesIO(response.content))
    return np.array(img)

def create_word_cloud(text, mask_url=None):
    """Generate word cloud from text with optional mask"""
    if mask_url:
        mask = get_mask_image(mask_url)
    else:
        mask = None

    wordcloud = WordCloud(
        width=800,
        height=400,
        background_color='white',
        mask=mask,
        contour_width=1,
        contour_color='black'
    ).generate(text)

    plt.figure(figsize=(10, 5))
    plt.imshow(wordcloud, interpolation='bilinear')
    plt.axis('off')
    plt.show()

def parse_arguments():
    """Parse command line arguments"""
    parser = argparse.ArgumentParser(description="Generate a word cloud from input text")
    parser.add_argument('--text', '-t', required=True, help="Input text for word cloud")
    parser.add_argument('--mask_url', '-m', help="URL of mask image for word cloud shape")
    return parser.parse_args()

if __name__ == "__main__":
    args = parse_arguments()
    create_word_cloud(args.text, args.mask_url)

This Python code creates a word cloud from a user’s input text, displays the most frequently used words in a beautiful visualization, and then saves it as an image. You can run this script —
python word_cloud_generator.py — text “Enter your text here to generate a word cloud” — mask_url “https://example.com/path/to/mask/image.png"
Replace the URL with the URL of your desired mask image. If you don’t want to use a mask, you can omit the
--mask_urlargument.
If you run the script, it will complain about the module not being found, as these modules do not come built-in with Python; these need to be installed before running the code.
If you are working with real-world applications, your code will have a lot of dependencies, and if developers have not maintained a requirements.txt It will be difficult to install them one by one.
python word_cloud_generator.py --text " This is a medium blog" --mask_url "pipreqs.png"

This is where this tool shines, go through Python files in the project, and generate the requirements.txt file based on imports.
Here is the simple syntax
pipreqs /path/to/project/location
I will run this command to generate me requirements.txt
pipreqs project
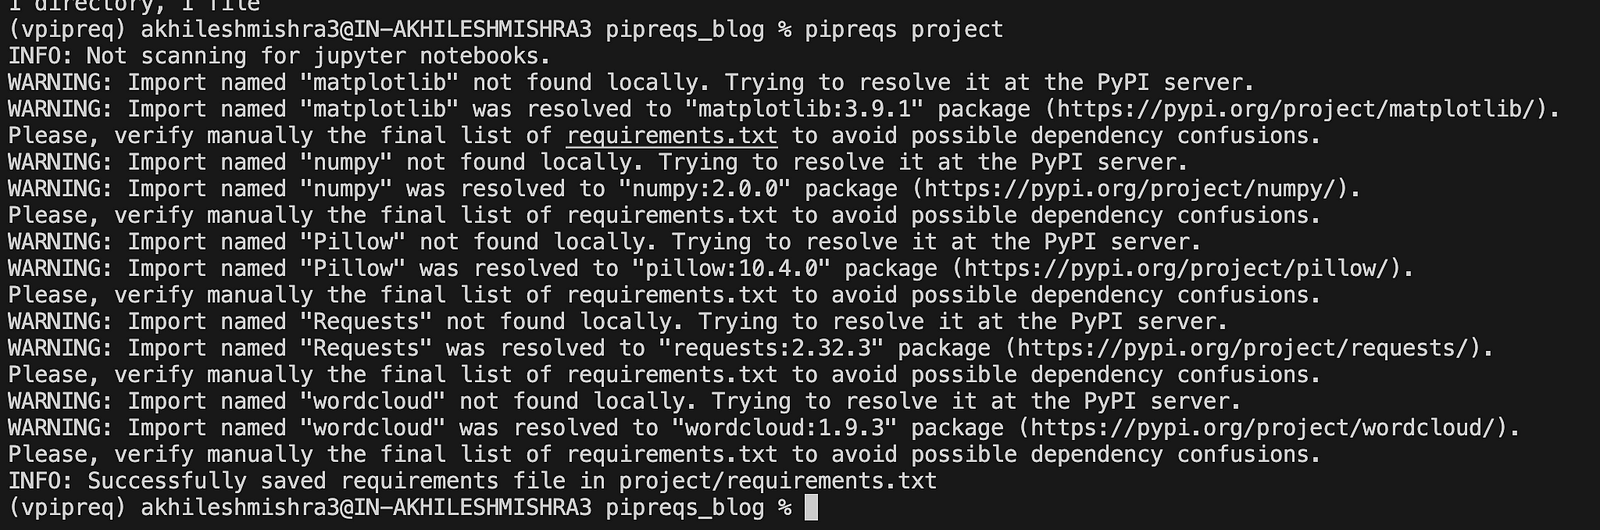

# requirements.txt
matplotlib==3.9.1
numpy==2.0.0
Pillow==10.4.0
Requests==2.32.3
wordcloud==1.9.3
We can install all these dependencies with one command
pip install -r project/requirements.txt
Now that we have resolved the dependencies, let’s run our code.
python project/word_cloud_generator.py --text "I hope you enjoy the blog post"

With the mask image
python project/word_cloud_generator.py --text "I hope you enjoy the blog post" --mask_url "https://livingdevops.com/wp-content/uploads/2023/11/online-course.jpg"

Advanced pipreqs Options
# Generate requirements for specific directory
pipreqs /path/to/your/project

# Specify output file name
pipreqs . --savepath requirements-dev.txt

# Force overwrite existing requirements.txt
pipreqs . --force

# Use local database for package names
pipreqs . --use-local

# Debug mode for troubleshooting
pipreqs . --debug
Method 2: Pigar
Installation
# using pip
pip install pigar

# or
pip install git+https://github.com/damnever/pigar.git@main --upgrade
# You can use conda as well to install pigar
conda install -c conda-forge pigar
Let me clone one of my repositories that has a tiny Flask app
git clone https://github.com/akhileshmishrabiz/Devops-zero-to-hero
cd cd Devops-zero-to-hero/project5
# Deleting existing requirements.txt file
rm requirements.txt
Now we will use pigar to generate the requirements.txt file
# Generate requirements.txt for current directory.
$ pigar generate
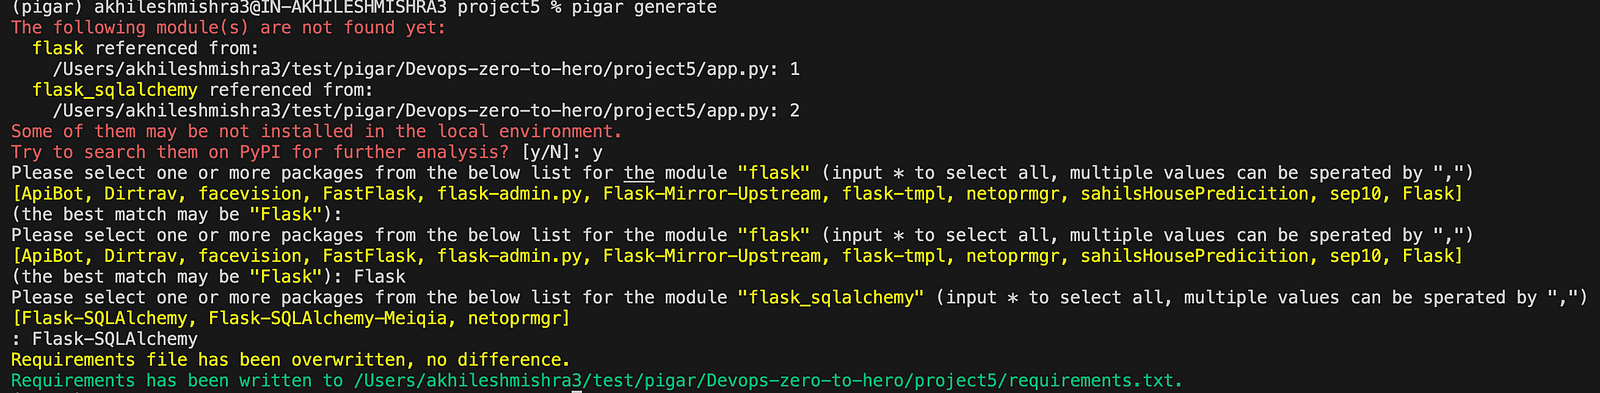
cat requirements.txt
# Automatically generated by https://github.com/damnever/pigar.
Flask==3.0.3
Flask-SQLAlchemy==3.1.1
It did the job for me. Now let’s try another project of mine that does not have a requirements.txt.
git clone https://github.com/akhileshmishrabiz/python-for-devops
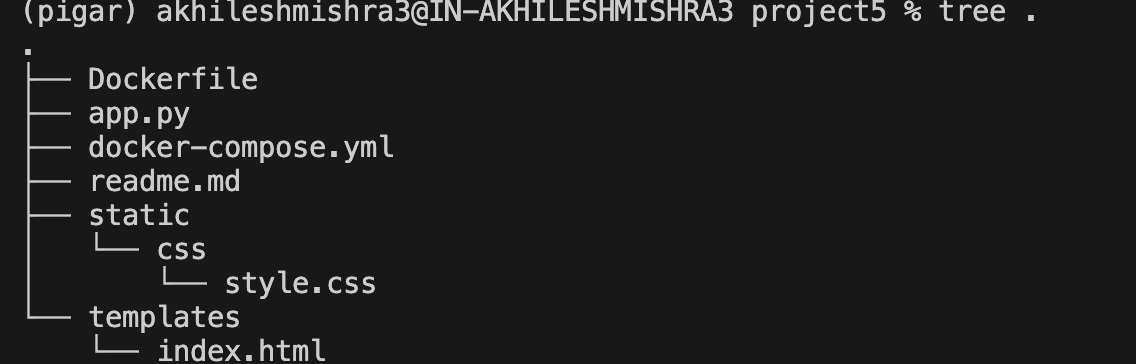
ls python-for-devops/python-lambda-runtime
tree python-for-devops/python-lambda-runtime

Let’s try to use pigar to generate the requirements.txt
# Generating requirements.txt for given directory in given file.
# pigar gen -f ../dev-requirements.txt ../
pigar gen -f python-for-devops/python-lambda-runtime/dev-requirements.txt python-for-devops/python-lambda-runtime/
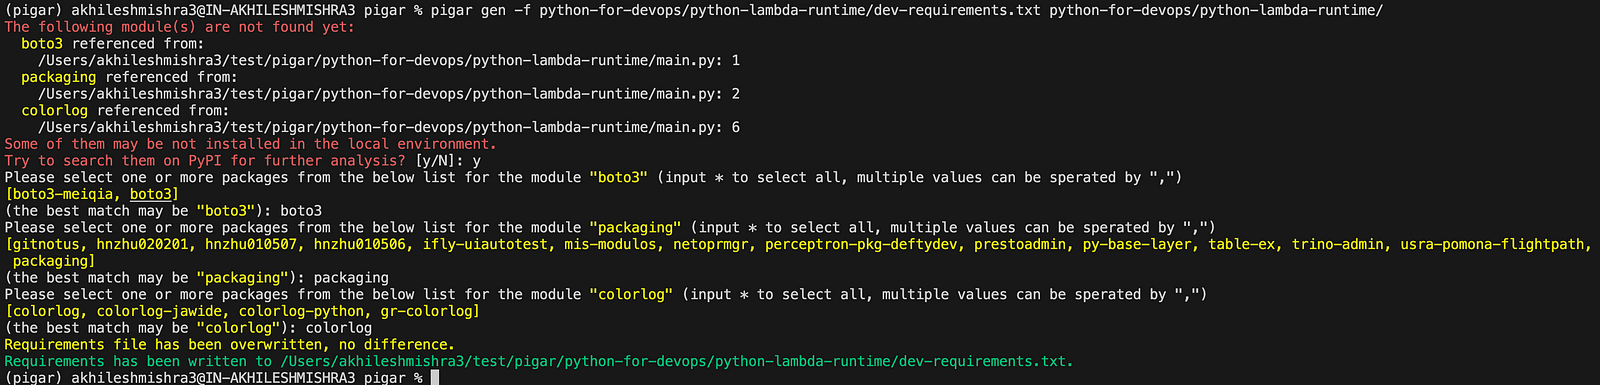
cat python-for-devops/python-lambda-runtime/dev-requirements.txt
# Automatically generated by https://github.com/damnever/pigar.
boto3==1.34.142
colorlog==6.8.2
packaging==24.1
Both of these tools are easy to use and flexible enough to accommodate various use cases. I hope you found this blog post valuable. Let me know which tool you prefer, or feel free to suggest any better tools you’ve come across.
Comparison: pipreqs vs pigar
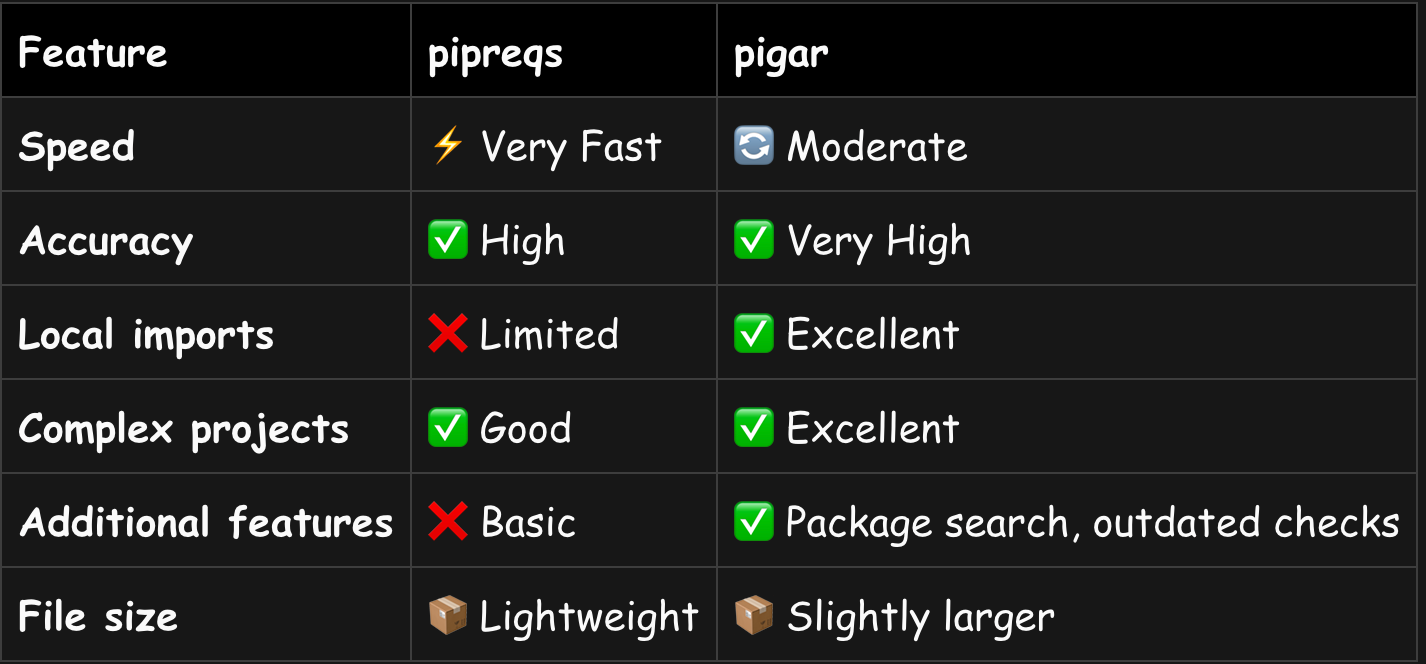
Conclusion
Both pipreqs and pigar are excellent tools for automating Python dependency management:
- Choose pipreqs for: Simple projects, fast generation, lightweight solution
- Choose pigar for: Complex projects, advanced features, comprehensive analysis
Stop wasting time manually managing Python dependencies. These tools will save you hours and reduce deployment errors significantly.
If you found this blog post useful, clap, follow, and subscribe so you don’t miss my future articles.
Connect with me on Linkedin: https://www.linkedin.com/in/akhilesh-mishra-0ab886124/
