Kubernetes feels easy at first, but it gets complex fast if you don’t understand the core
But knowing the story is not enough to use it in production. Now we go one level deeper and learn how Kubernetes actually works and how to run applications on it.

The world of Kubernetes can feel overwhelming at first, but almost always, that feeling comes from skipping the fundamentals.
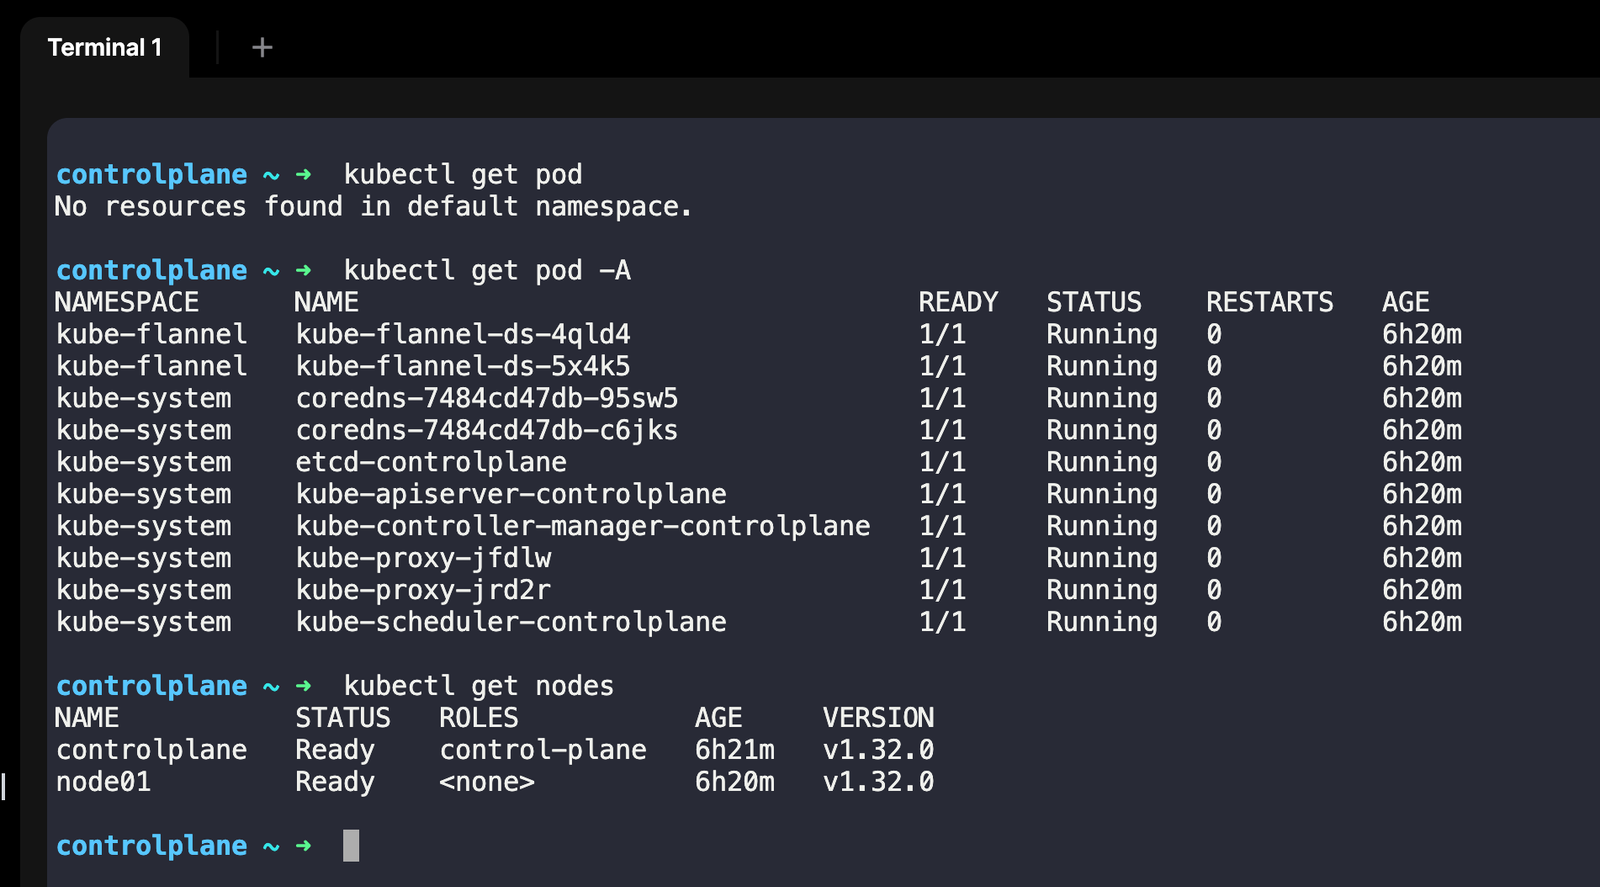
So, before we write a single kubectl command, let us start with the architecture.
Once you understand how the pieces fit together, everything else becomes much easier to reason about.
Learn Kubernetes with production-grade projects in my Upcoming Advanced Kubernetes (with AWS EKS) Bootcamp.
You learn how to run complex microservices, a stateful set with proper CICD, Observability, DevSecOps implementation, SRE, live incident troubleshooting, and a lot more.
8-week Advanced K8s (EKS) Bootcamp
Kubernetes Architecture
Think of Kubernetes like a factory. You have a management team that makes decisions, and you have workers who actually do the work.
The management team is called the control plane. The workers are called worker nodes. This separation is important because it means you can scale your workers independently of your management.

Let me break down each component and show you what actually happens when you deploy an application.
Control Plane: The Management Team
The control plane has four main components. Each has one specific job. Understanding these four pieces makes everything else click.
API Server: It’s the only entry point to kubernetes cluster
It’s the front desk of Kubernetes. You talk to it using kubectl, and it handles:
- Authentication — are you allowed to talk to this cluster?
- Authorization — are you allowed to do this specific action?
- Validation — does your request make sense?
- Storing changes in etcd — the cluster’s database
Important: The API Server doesn’t actually do the work. It just accepts requests and coordinates other components.
Controller: The guy who runs the show
The Controller Manager’s job is simple: make sure the actual state matches the desired state.
You told Kubernetes you want 3 pods running. The Controller Manager watches etcd constantly. If it sees only 2 pods running, it tells the Scheduler we need another pod.
This is called a control loop. It never stops checking:
- What did the user ask for? (desired state)
- What’s actually running? (actual state)
- Do they match? If not, fix it.
This is why Kubernetes is so powerful. You don’t manage individual containers. You declare what you want, and Kubernetes continuously works to make it happen.
Scheduler: The guy who macro-manages everything
- When the Controller Manager says we need a new pod, the Scheduler decides which worker node should run it.
It looks at:
- Resource requirements — does this pod need 2 CPUs and 4GB RAM?
- Node capacity — which nodes have available resources?
- Constraints and policies — are there rules about where this pod can run?
- Affinity rules — should this pod run close to certain other pods?
Critical point: The Scheduler only decides where to run the pod. It doesn’t actually start it. That’s the kubelet’s job.
etcd: The company database
etcd is a distributed key-value database. It stores everything about your cluster:
- What pods are running and where?
- What’s the status of each pod?
- What deployments exist?
- What services are configured?
- What’s the desired state of everything?
Every component in Kubernetes watches etcd. When something changes in etcd, components react. A pod dies? etcd updates. Controller Manager sees the update. It tells the Scheduler to fix it.
Important: etcd stores cluster state, not your application data. Your application databases, files, and data live elsewhere. etcd only tracks what Kubernetes needs to know.
Worker Nodes: Where Your Apps Actually Run
Worker nodes do the real work. Each worker node has three main components working together.
Container Runtime
This is what actually runs your containers. Kubernetes originally used Docker, but now uses containerd, a lighter container runtime without Docker’s heavy engine.
You don’t interact with the container runtime directly. The kubelet does that for you.
kubelet
This is the most important component on a worker node. Without kubelet, your node can’t join the cluster.
The kubelet:
- Talks to the control plane — what pods should I run?
- Starts and stops containers using the container runtime
- Monitors pod health — are they still running?
- Reports back to the control plane — here’s what’s happening on my node
If the kubelet stops working, the node goes offline. Pods keep running, but Kubernetes loses control over them.

kube-proxy
kube-proxy handles networking between pods across different nodes.
You have pods on Node A that need to talk to pods on Node B.
- How do they find each other?
- How does traffic get routed?
kube-proxy creates network rules so pods can communicate as if they’re on the same machine, even when they’re on different nodes in different data centers.
You do not run an application on Kubernetes as a container; you run it as a pod.
Pods: The Basic Building Block
Consider the pod as a wrapper on top of the container. It is the smallest unit in Kubernetes.
Think of it as a small apartment. Most of the time, one pod = one container. But you can have multiple containers in one pod if they need to share resources.
This ephemeral design is intentional. Kubernetes assumes pods will die and replaces them automatically. This is why you need Deployments.
Deployments: Keeping Your Apps Alive
If you create a pod and it dies, it’s gone. You’d have to manually create a new one. Deployments solve this. It procide self healing capability to your application
When you create a Deployment and say you want 3 replicas, here is what happens:
- Deployment creates 3 pods
- One pod crashes? Deployment immediately creates a replacement
- You always have exactly 3 pods running
- Want to scale to 5? Change replicas: 5. Done.
- Need to update? Deployment handles rolling updates with zero downtime
This is why in production, we ALWAYS use Deployments. Never create pods directly.
Services: Your App’s Permanent Address
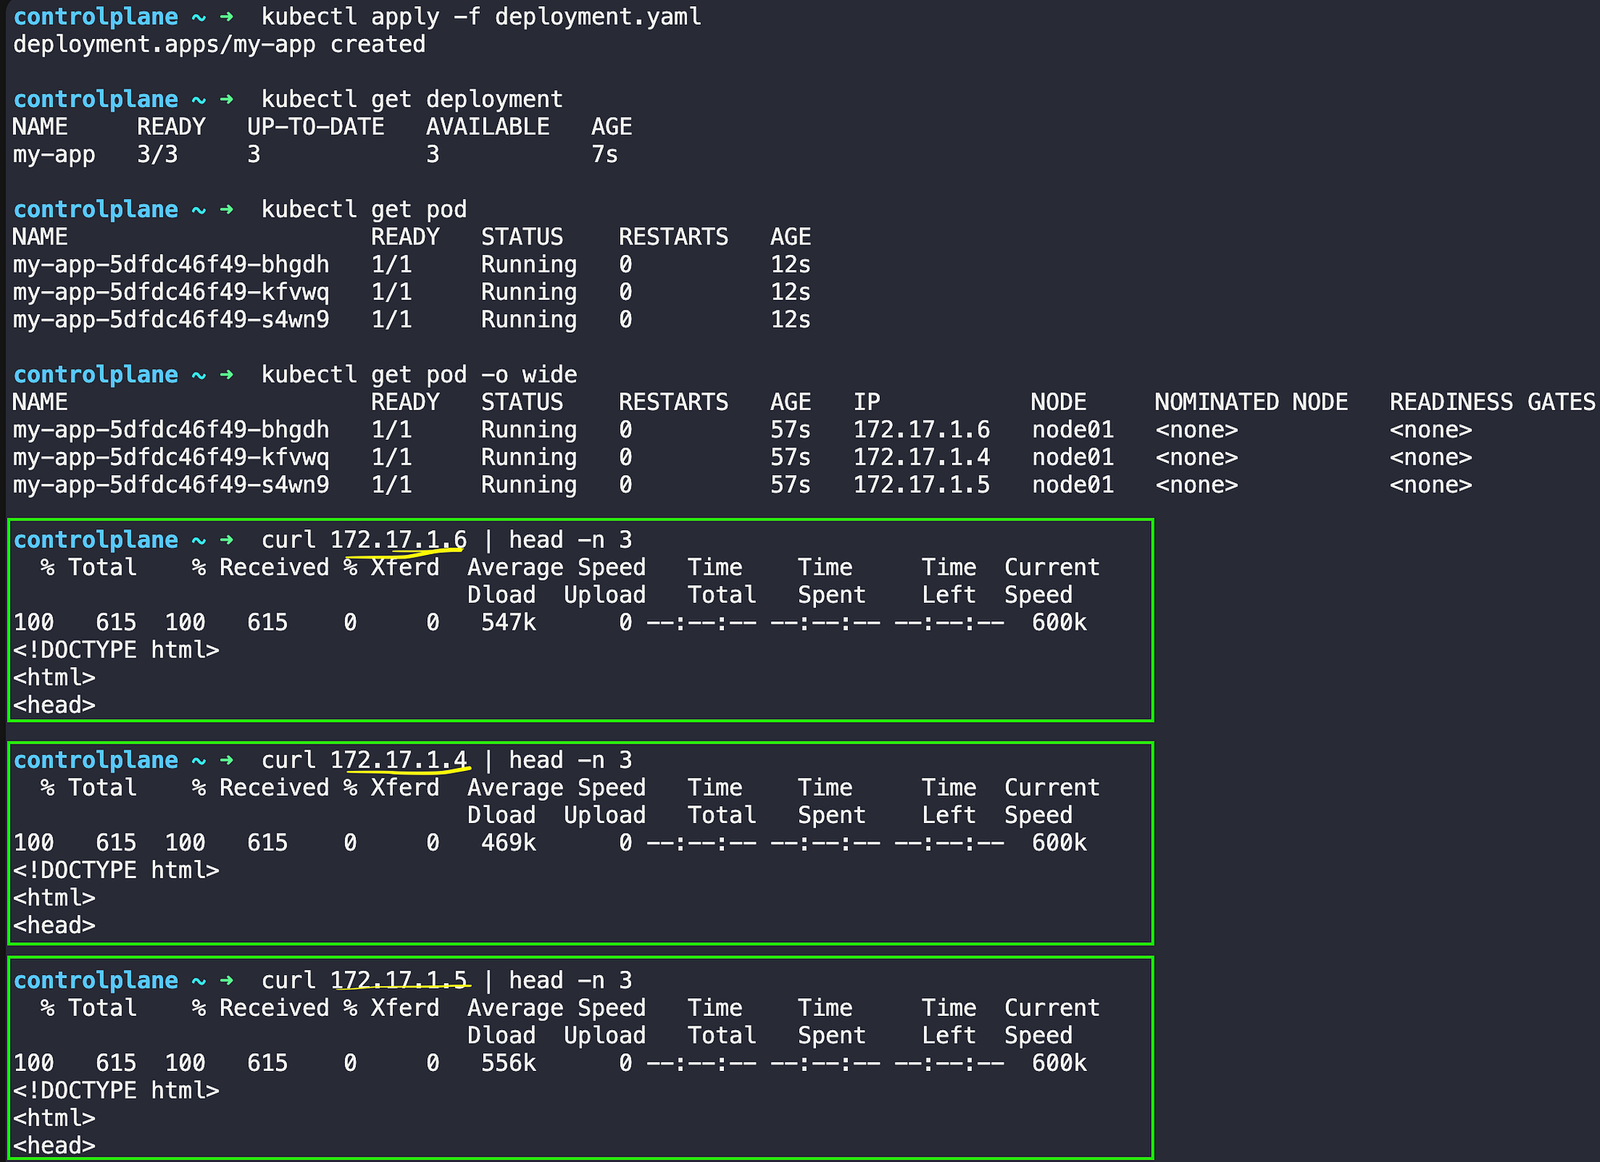
Here’s the problem: pods get new IP addresses every time they restart. How do other apps find yours? Services solve this by giving your app one stable address. Let me use an example.
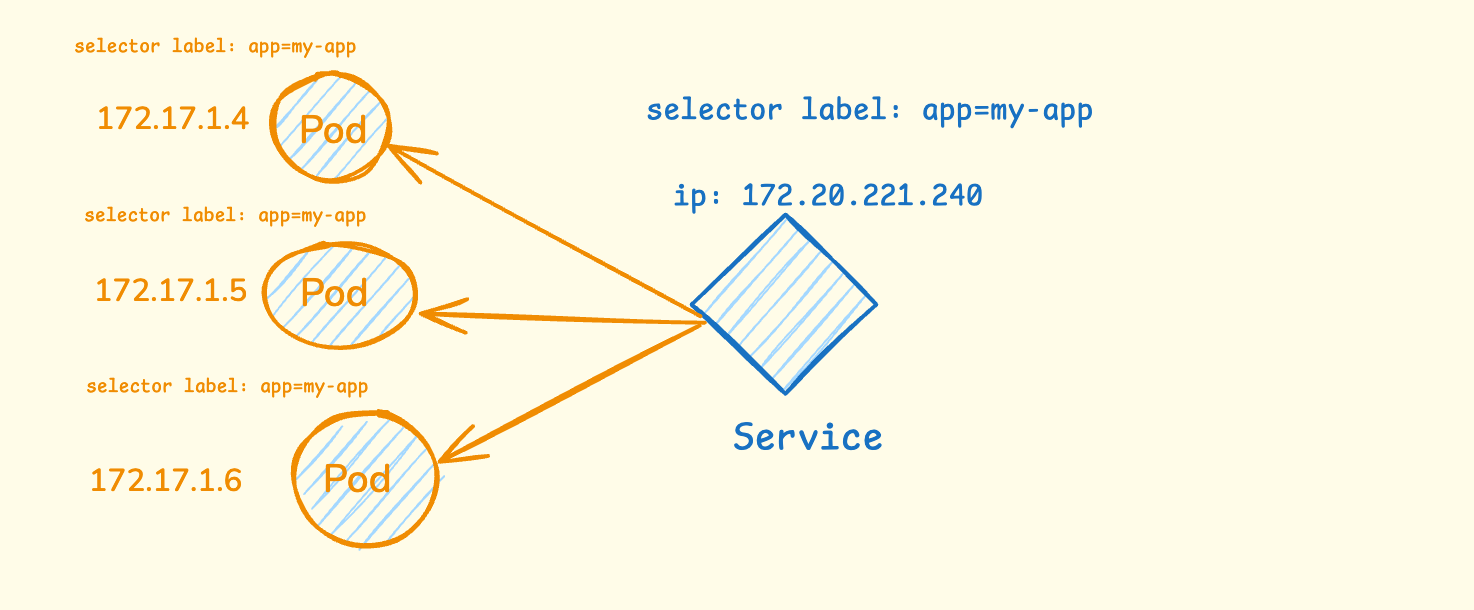
In the diagram above, you can see three pods running with different IP addresses (172.17.1.4, 172.17.1.5, 172.17.1.6). Each pod has the same label app=my-app. When one of these pods dies and gets replaced, it will get a completely different IP address.
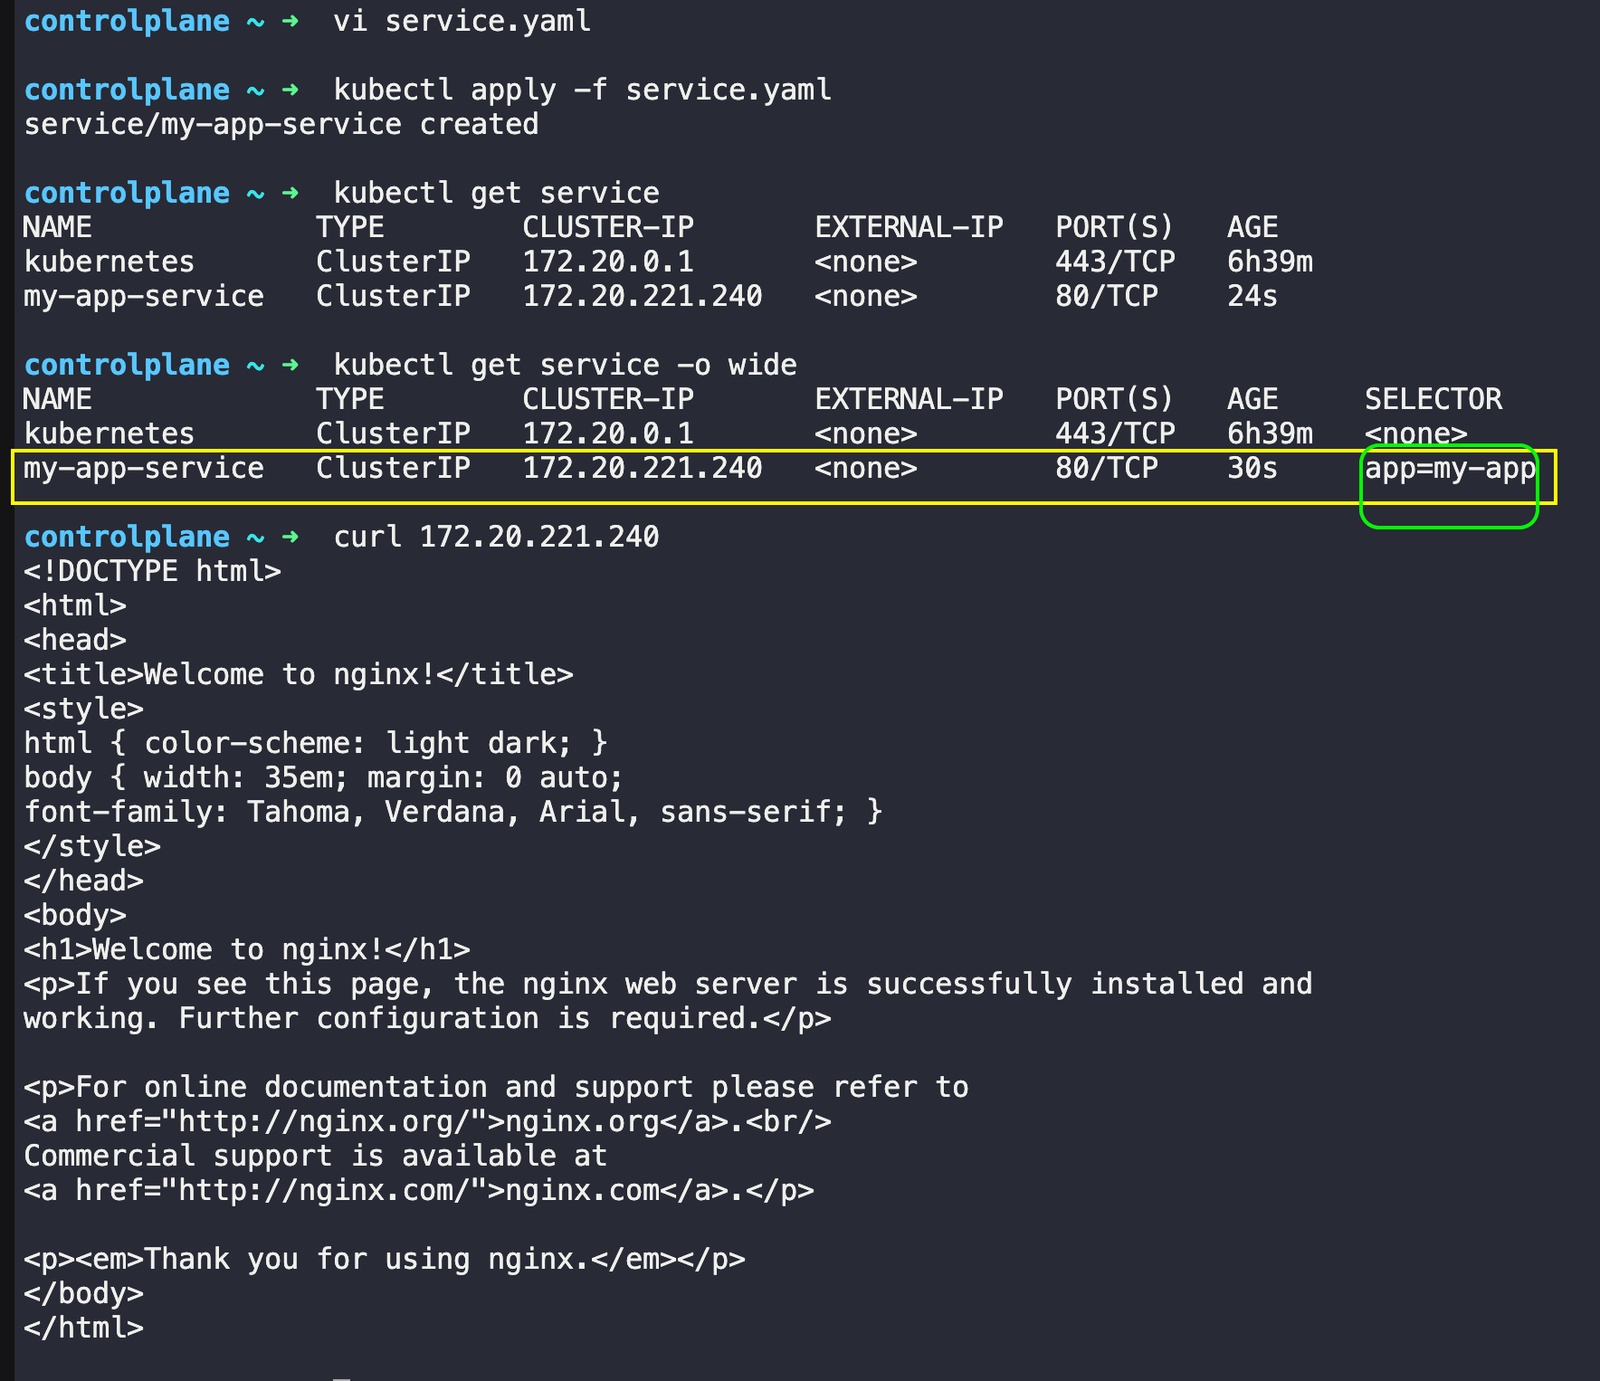
The Service creates a stable front door with one permanent IP address (172.20.221.240). It uses selector labels to find all pods that have the label automatically app=my-app. No matter which pods are running or what their individual IP addresses are, other applications can always reach your app through the Service’s stable IP.
The Service also acts as a load balancer. When a request comes to the Service IP, it automatically distributes the traffic across all healthy pods. So if you have 3 pods running, the Service will spread incoming requests between all 3 pods, ensuring no single pod gets overloaded.
Service Types
There are three main Service types. Each solves a different problem.
ClusterIP
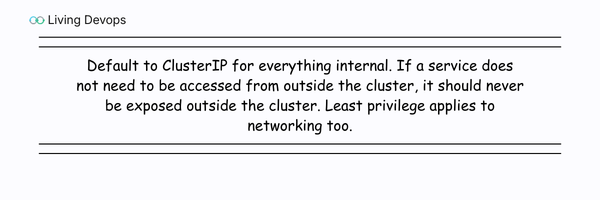
ClusterIP is the default(Internal Only). It gives your Service an IP address that’s only accessible inside the cluster.
Use this for:
- Databases — you don’t want these exposed to the internet
- Backend APIs — internal services that only other services need
- Most internal communication between services
In production, 90% of your Services are ClusterIP. This is the most common type.
NodePort
NodePort exposes your Service on a specific port (30000–32767) on every node in your cluster.
If you have 3 nodes, you can reach your Service at:
- <node1-ip>:30080
- <node2-ip>:30080
- <node3-ip>:30080
Use this for development and testing. Not recommended for production — you’d have to manage which nodes are healthy and update your DNS constantly.
LoadBalancer
LoadBalancer creates an actual cloud load balancer (like AWS ALB or NLB) and gives you a public IP or DNS name.
This is what you use in production for services that need external access:
- Web frontends
- Public APIs
- Any service user can access from the internet
Problem: Each LoadBalancer Service creates a separate cloud load balancer. If you have 10 services, you get 10 load balancers. This gets expensive fast.
That’s why we use Ingress for production. We will talk about it later.
How They Work Together
Deployment ──→ Manages ──→ Pods ──→ Run ──→ Containers
    ↑                        ↑
    │                        │
    └── Controls ─────────────┘

Service ──→ Points to ──→ Pods (using labels)
- Deployment creates and manages Pods
- Pods run your actual application containers
- Service provides a stable way to reach your Pods
- When Pods die, Deployment creates new ones
- Service automatically finds the new Pods using labels
This three-layer approach gives you reliability (Deployment), isolation (Pods), and stable networking (Services) — everything you need to run applications in production.
Enough with the theory, let me show you how we run applications on Kubernetes.
Running your first application on Kubernetes.
For the demo, I will use KodeKloud Kubernetes playground. You can use other alternatives such as minikube, kind, etc.
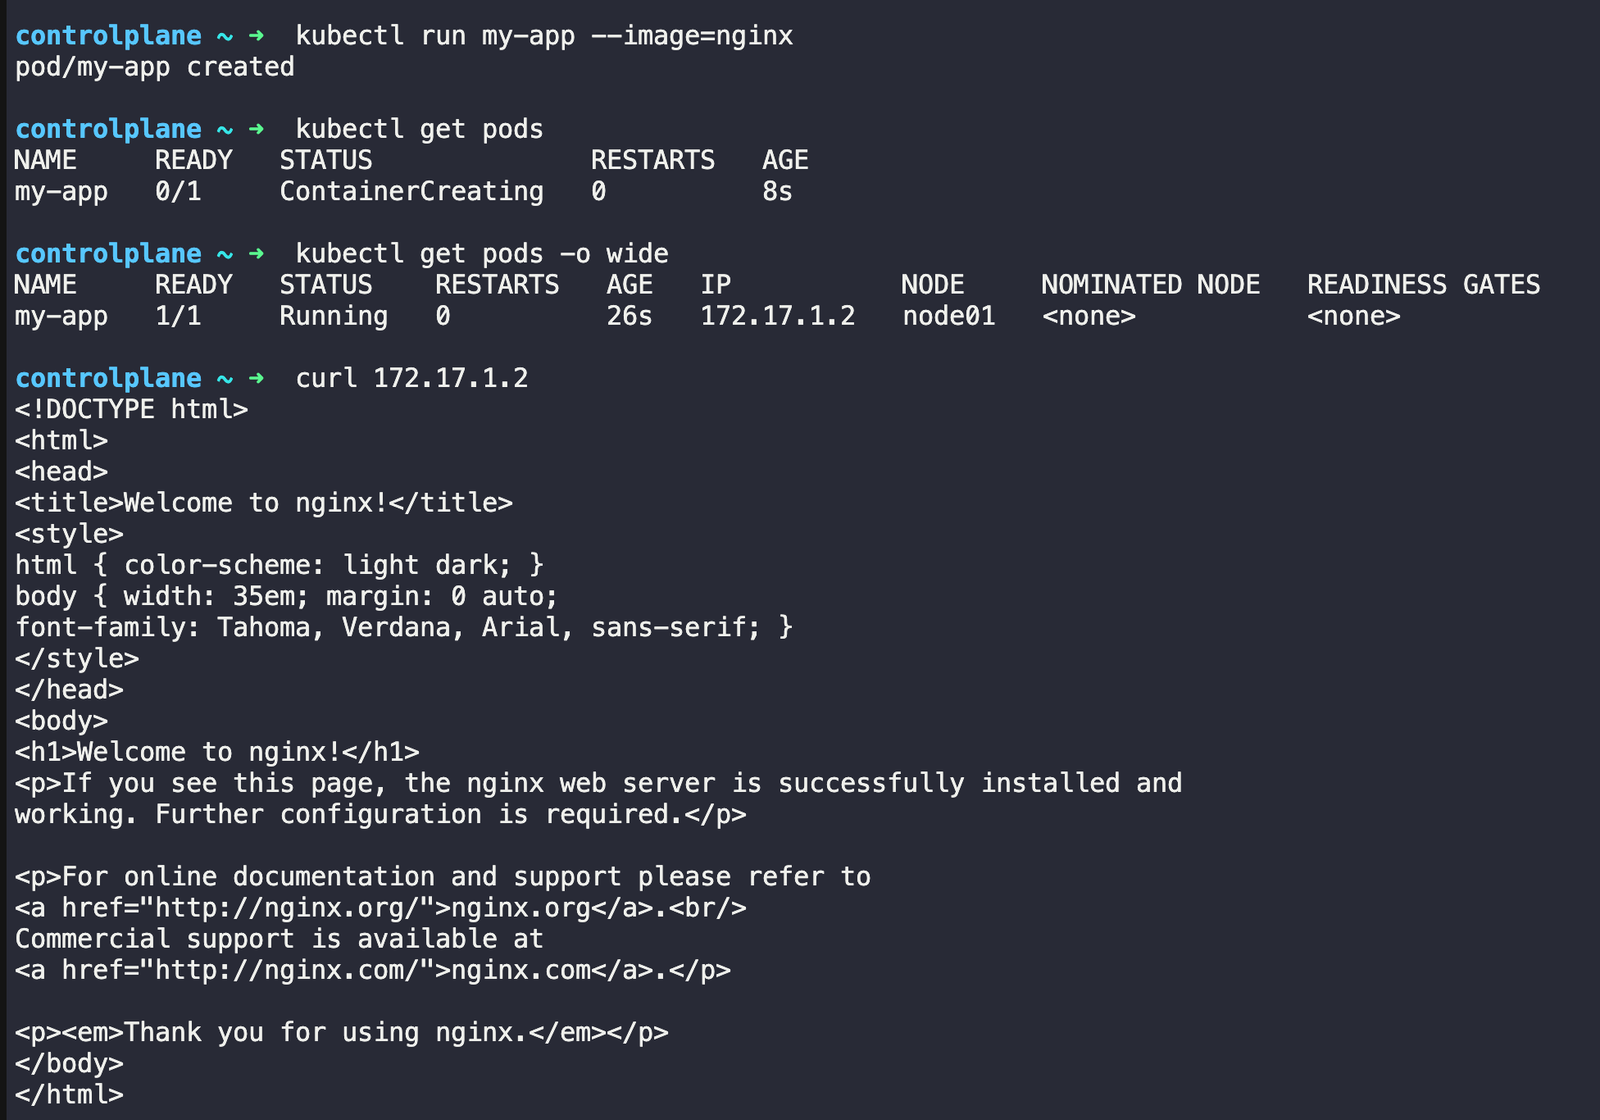
Running the first pod
# Create a pod
kubectl run my-app --image=nginx
# See your pod
kubectl get pods
# get more details with wide option
kubectl get pods -o wide
# see the ruuning app
curl 172.17.1.2
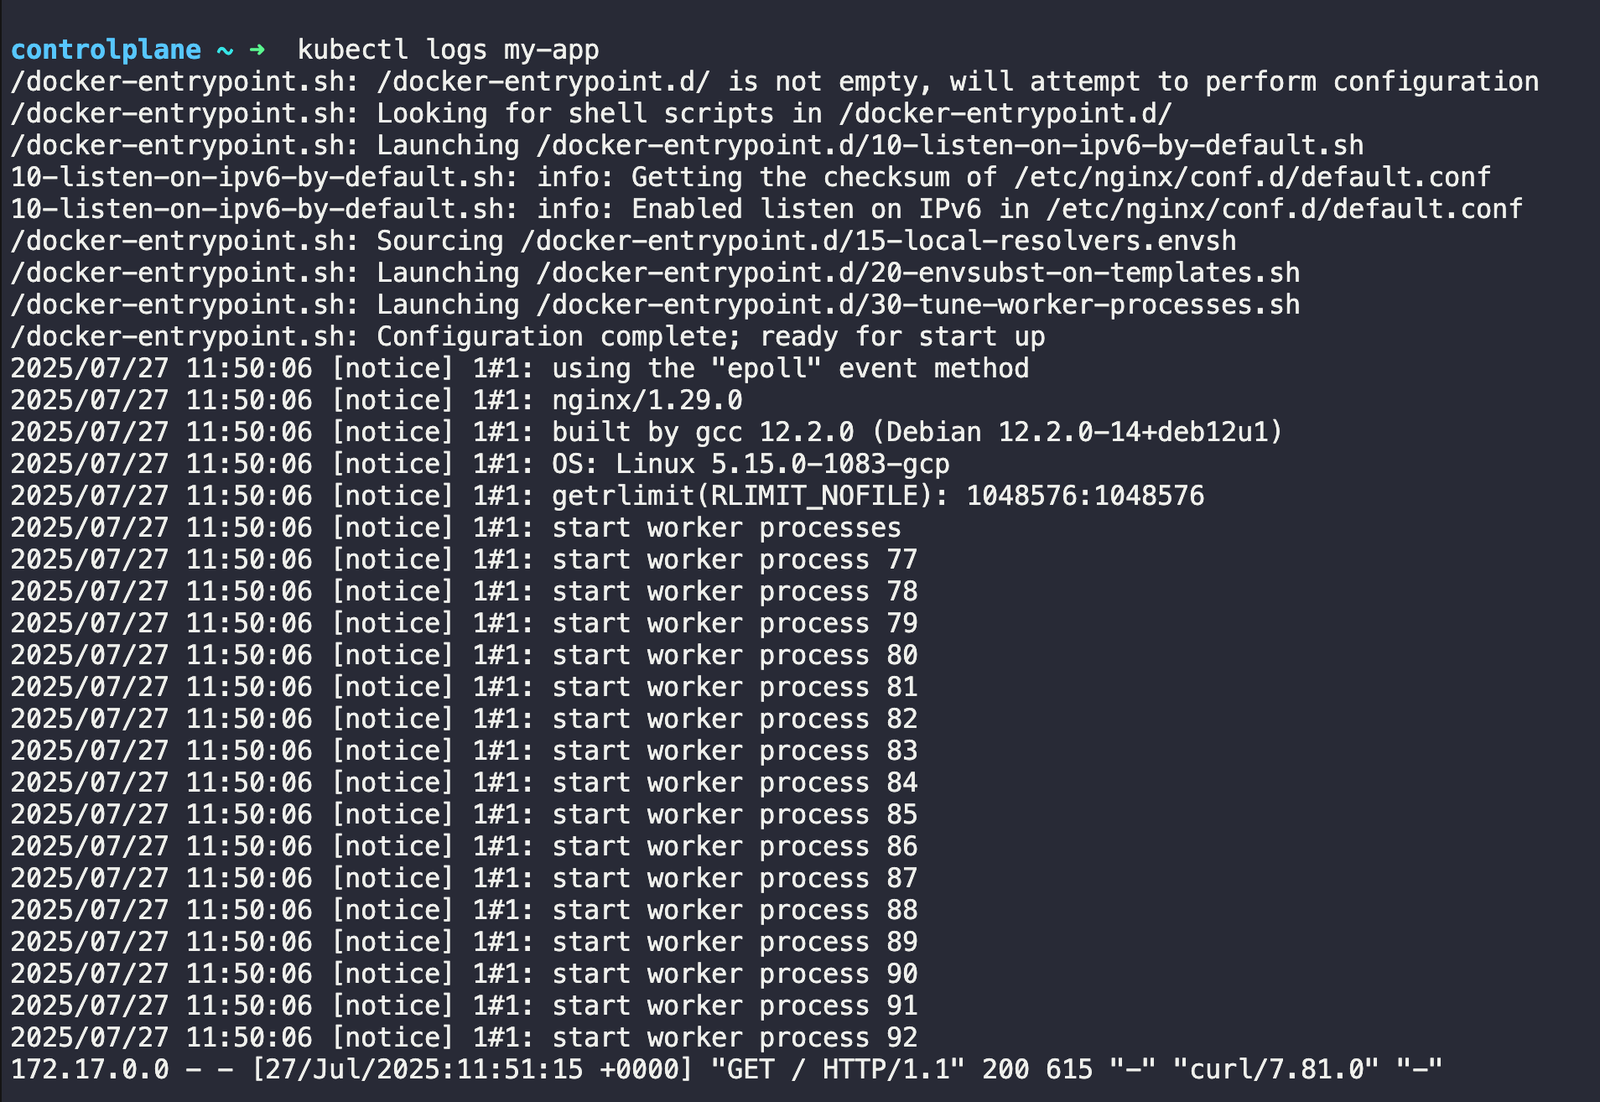
# Check what's happening
kubectl describe pod my-app
# check the logs
kubectl logs my-app
Describe command output
You can check the events.

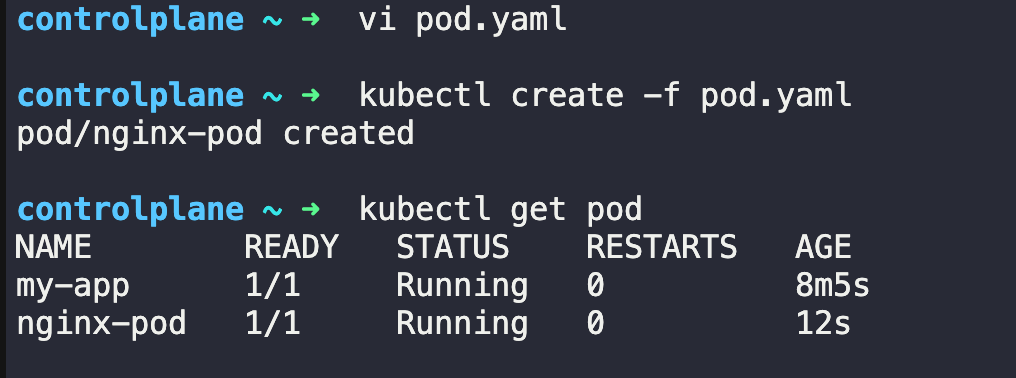
You can also create the pod using a YAML file
pod.yaml
apiVersion: v1
kind: Pod
metadata:
  name: nginx-pod
spec:
  containers:
  - name: nginx
    image: nginx
    ports:
    - containerPort: 80
This YAML defines a simple pod that runs an nginx container on port 80. The metadata section gives it a name, while the spec section describes what container to run.
kubectl apply -f pod.yaml
Deleting the pod
kubectl delete pod my-app
kubectl delete pod nginx-pod
Deployment
Deployments make sure your app stays running. If a pod dies, the deployment creates a new one.
deployment.yaml
apiVersion: apps/v1
kind: Deployment
metadata:
  name: my-app
spec:
  replicas: 3
  selector:
    matchLabels:
      app: my-app
  template:
    metadata:
      labels:
        app: my-app
    spec:
      containers:
      - name: my-app
        image: nginx
This deployment creates 3 identical pods running nginx containers. The selector tells the deployment which pods to manage using labels, while the template defines what each pod should look like.
kubectl apply -f deployment.yaml
kubectl get deployment
kubectl get pods
kubectl get pods -o wide
You can try a few more things like
# Test auto-healing: delete a pod
kubectl delete pod <pod-name>
kubectl get pods  # Watch it come back!
# Scale your deployment
kubectl scale deployment my-app --replicas=5
kubectl get pods
Services
Pods get new IP addresses when they restart. Services provide a single stable address to reach your app.
apiVersion: v1
kind: Service
metadata:
  name: my-app-service
spec:
  selector:
    app: my-app
  ports:
  - port: 80
    targetPort: 80
  type: ClusterIP
This service creates a stable endpoint that routes traffic to any pod with the label app=my-app. Port 80 is where you access the service, and targetPort 80 is where the pods are listening.
# Create the service
kubectl apply -f service.yaml

# Check your service
kubectl get services
# Test it works (from inside cluster)
kubectl get service my-app-service  # Get service IP
curl <service-ip>
But running real applications in production requires more than just the basics.

In our next post, we’ll tackle the practical challenges you’ll face when deploying actual applications.
